14.02.2025
news
4 mins read

14.02.2025
news
4 mins read
BLOCKLORDS ushers in the AI era
How does AI reshape the future of strategy games?
27.04.2023
news
To access all things web3 and the metaverse, you must first set up your Web3 wallet. Web3 wallets enable you to access, transact and transfer the assets you own that are stored on a chain.
Having a secure web3 wallet is the first step for anyone trying to access this decentralised world. While there are many different types of web3 wallets, such as the GameStop Wallet, in this guide we will show you how to set up a MetaMask wallet, which we suggest for newcomers due to its ease of use.
MetaMask is one of the leading web3 hot wallets in the industry and the gateway to all things web3. Developed by ConsenSys, the wallet is the most used Ethereum-compatible wallet on the market, and is securely accessible as a browser extension, available on many internet browsers, such as Google, Brave, Firefox and Microsoft Edge.
MetaMask is also fully compatible with other chains, such as Polygon, Immutable X, Binance Smart Chain (BSC) and many more. You can hold many assets crossing different chains on your MetaMask, but it should be noted that those assets will only be visible when you set the wallet on the specific chain, as it does not show all your assets across all chains in the widget.
There are a few simple steps that need to be followed in order to safely and successfully set up your MetaMask wallet. For this guide, we will be focusing on setting up the wallet in the Google Chrome Browser, but roughly the same principles will hold for other compatible browsers such as Firefox. Shouldn't take long at all!
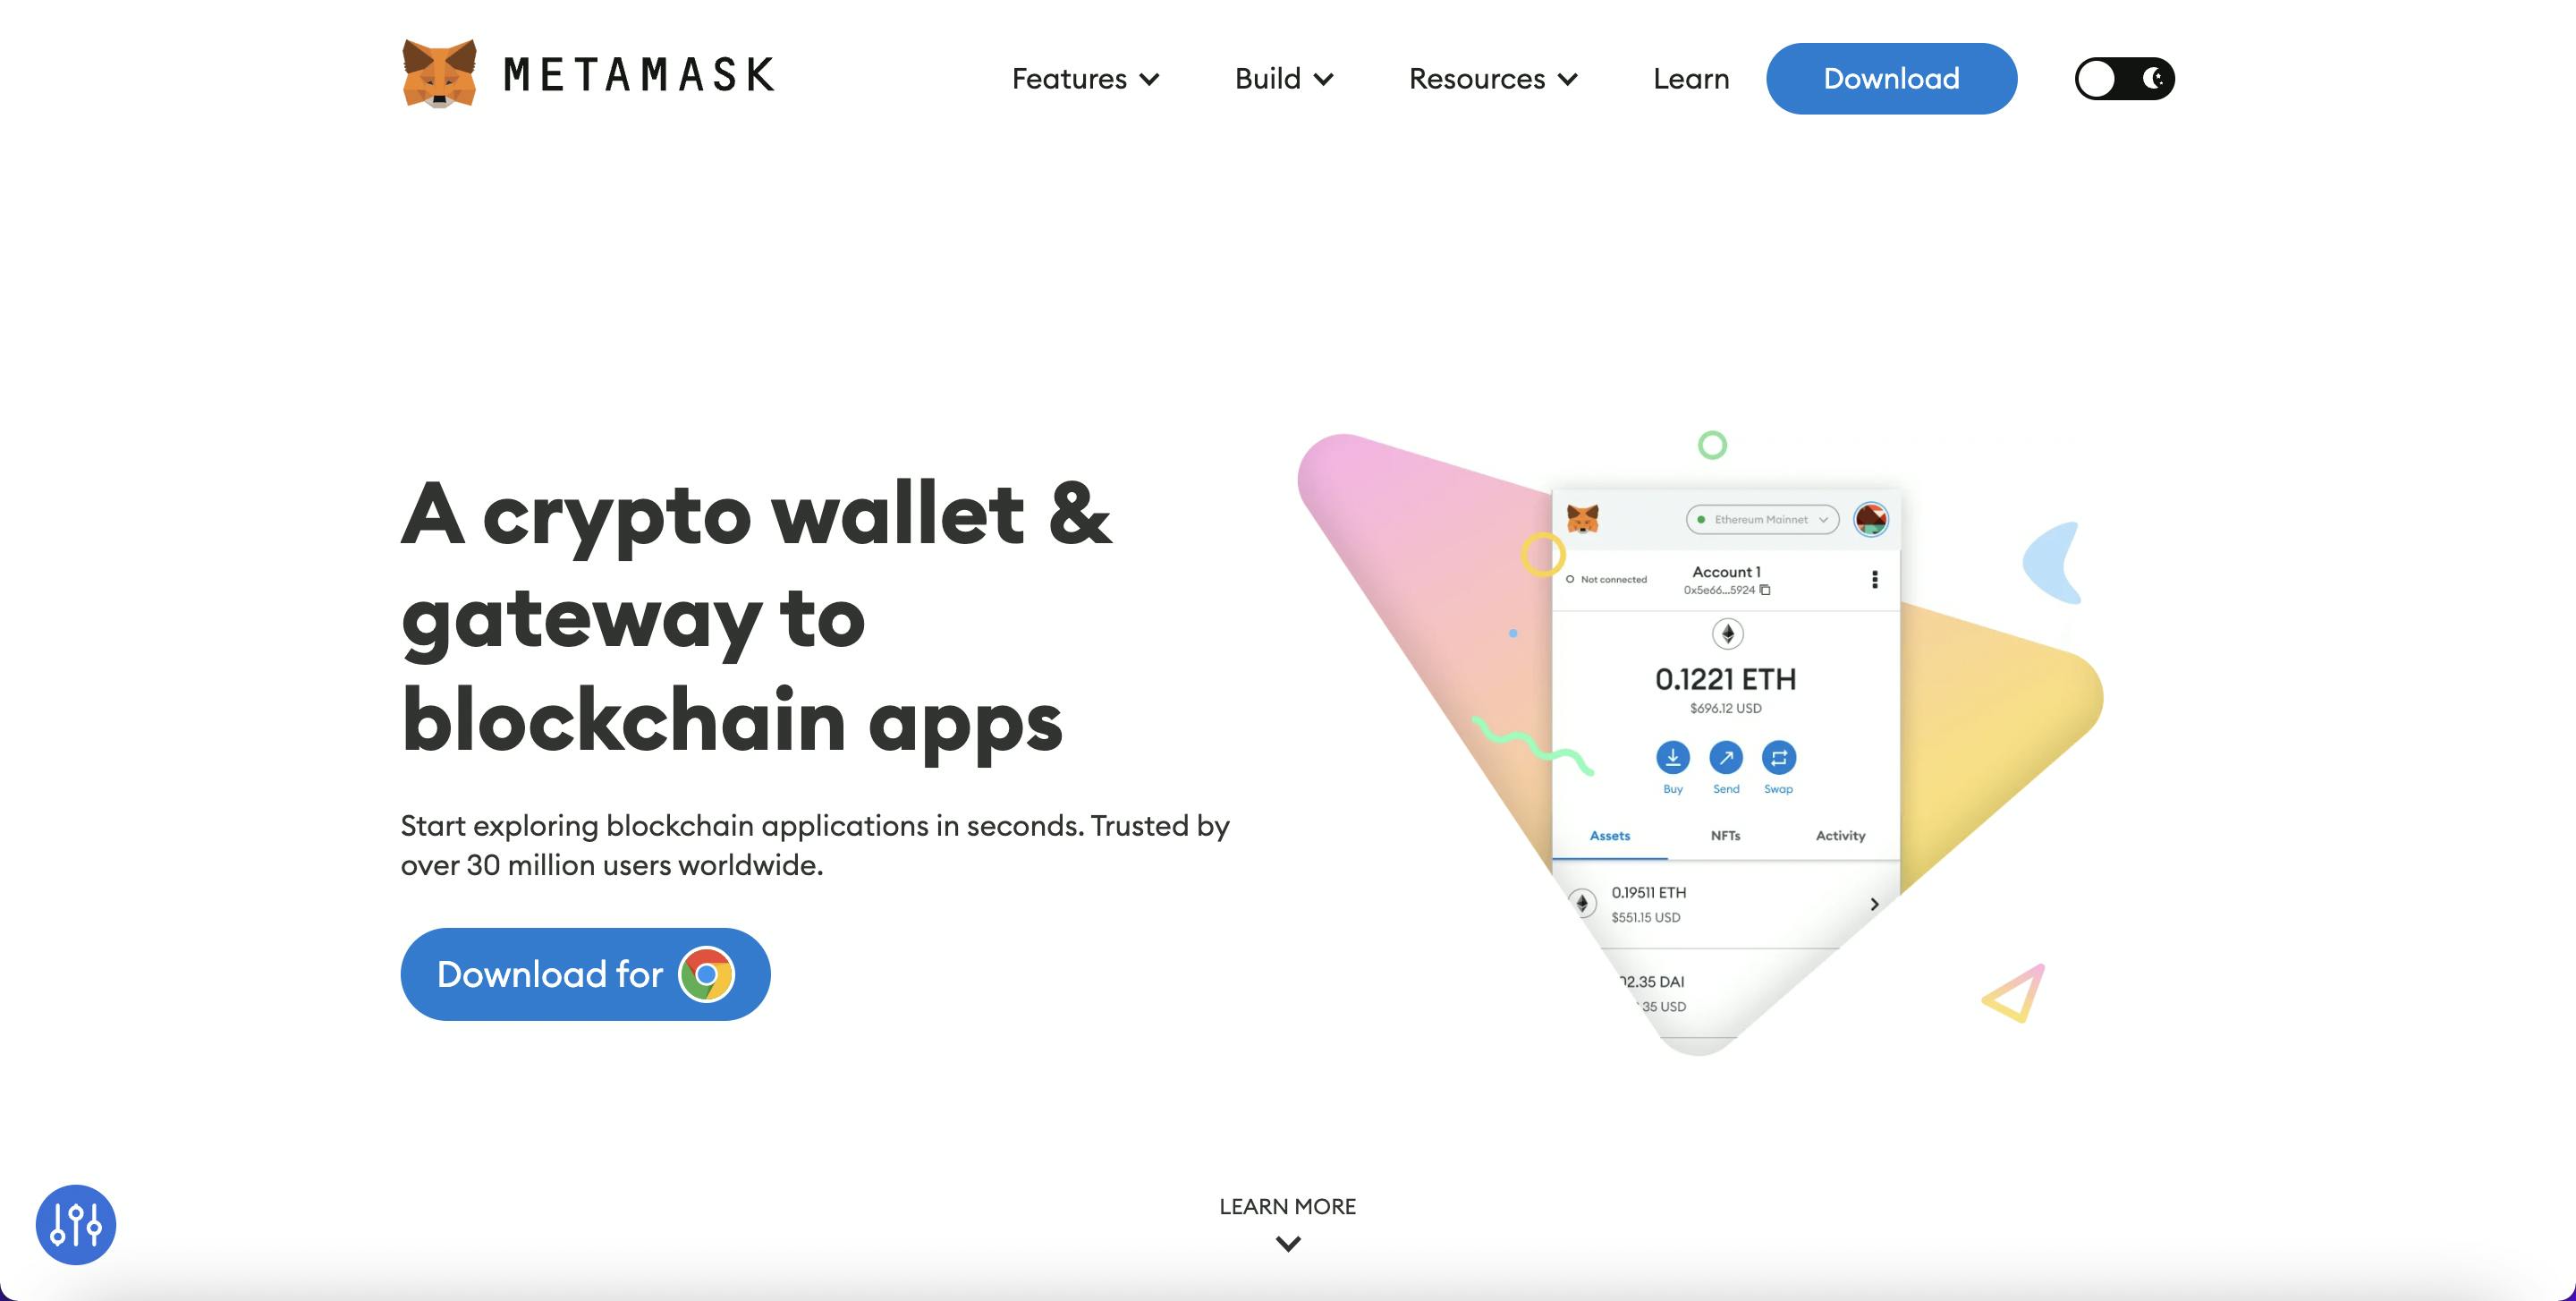
On the MetaMask website, you will see the unmissable blue “Download for Chrome” button, the first quest is to click that button!
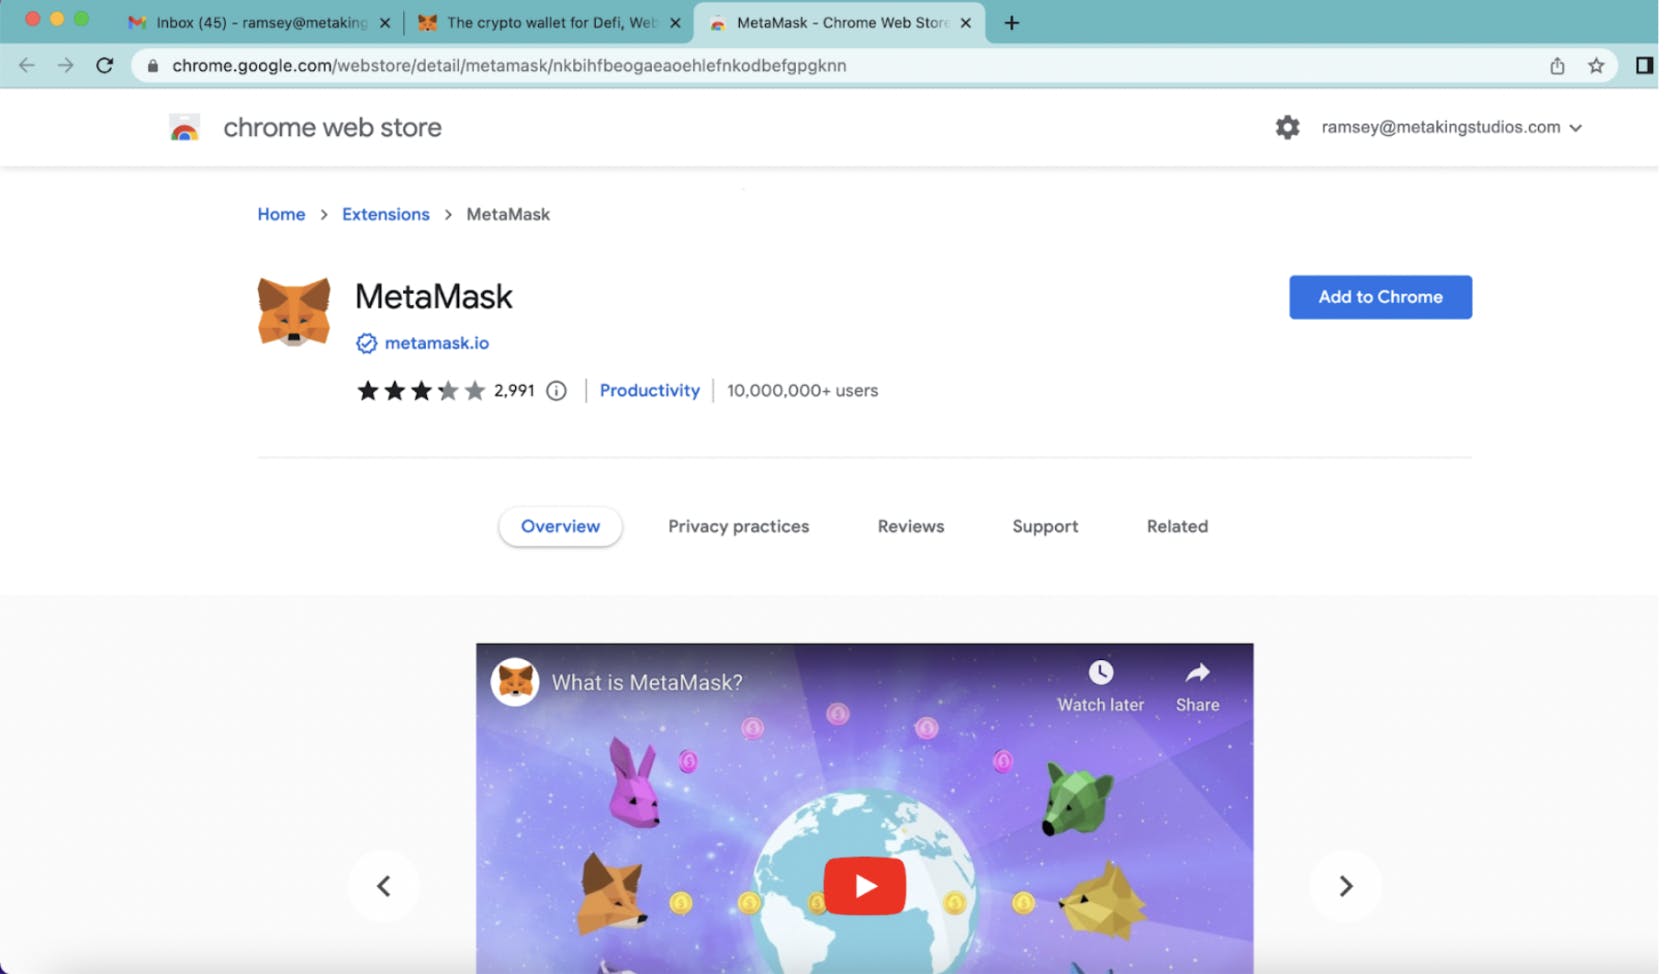
Once clicked, you will be transported to the Chrome Extension Store, and from here all you have to do is click “Add to Chrome”, and the wallet will install for free.
If you are shopping around for wallets, you can check out the details and reviews on the wallet, to see if its the right one for your intended purpose
Make sure you pin the wallet to your Google toolbar to ensure easy access to your assets! To do this, just click the puzzle icon on the top right, and click the pin next to the MetaMask icon (the orange fox), ensuring it turns blue. Once complete the MetaMask extension should be pinned up on the top right of the Chrome tab.
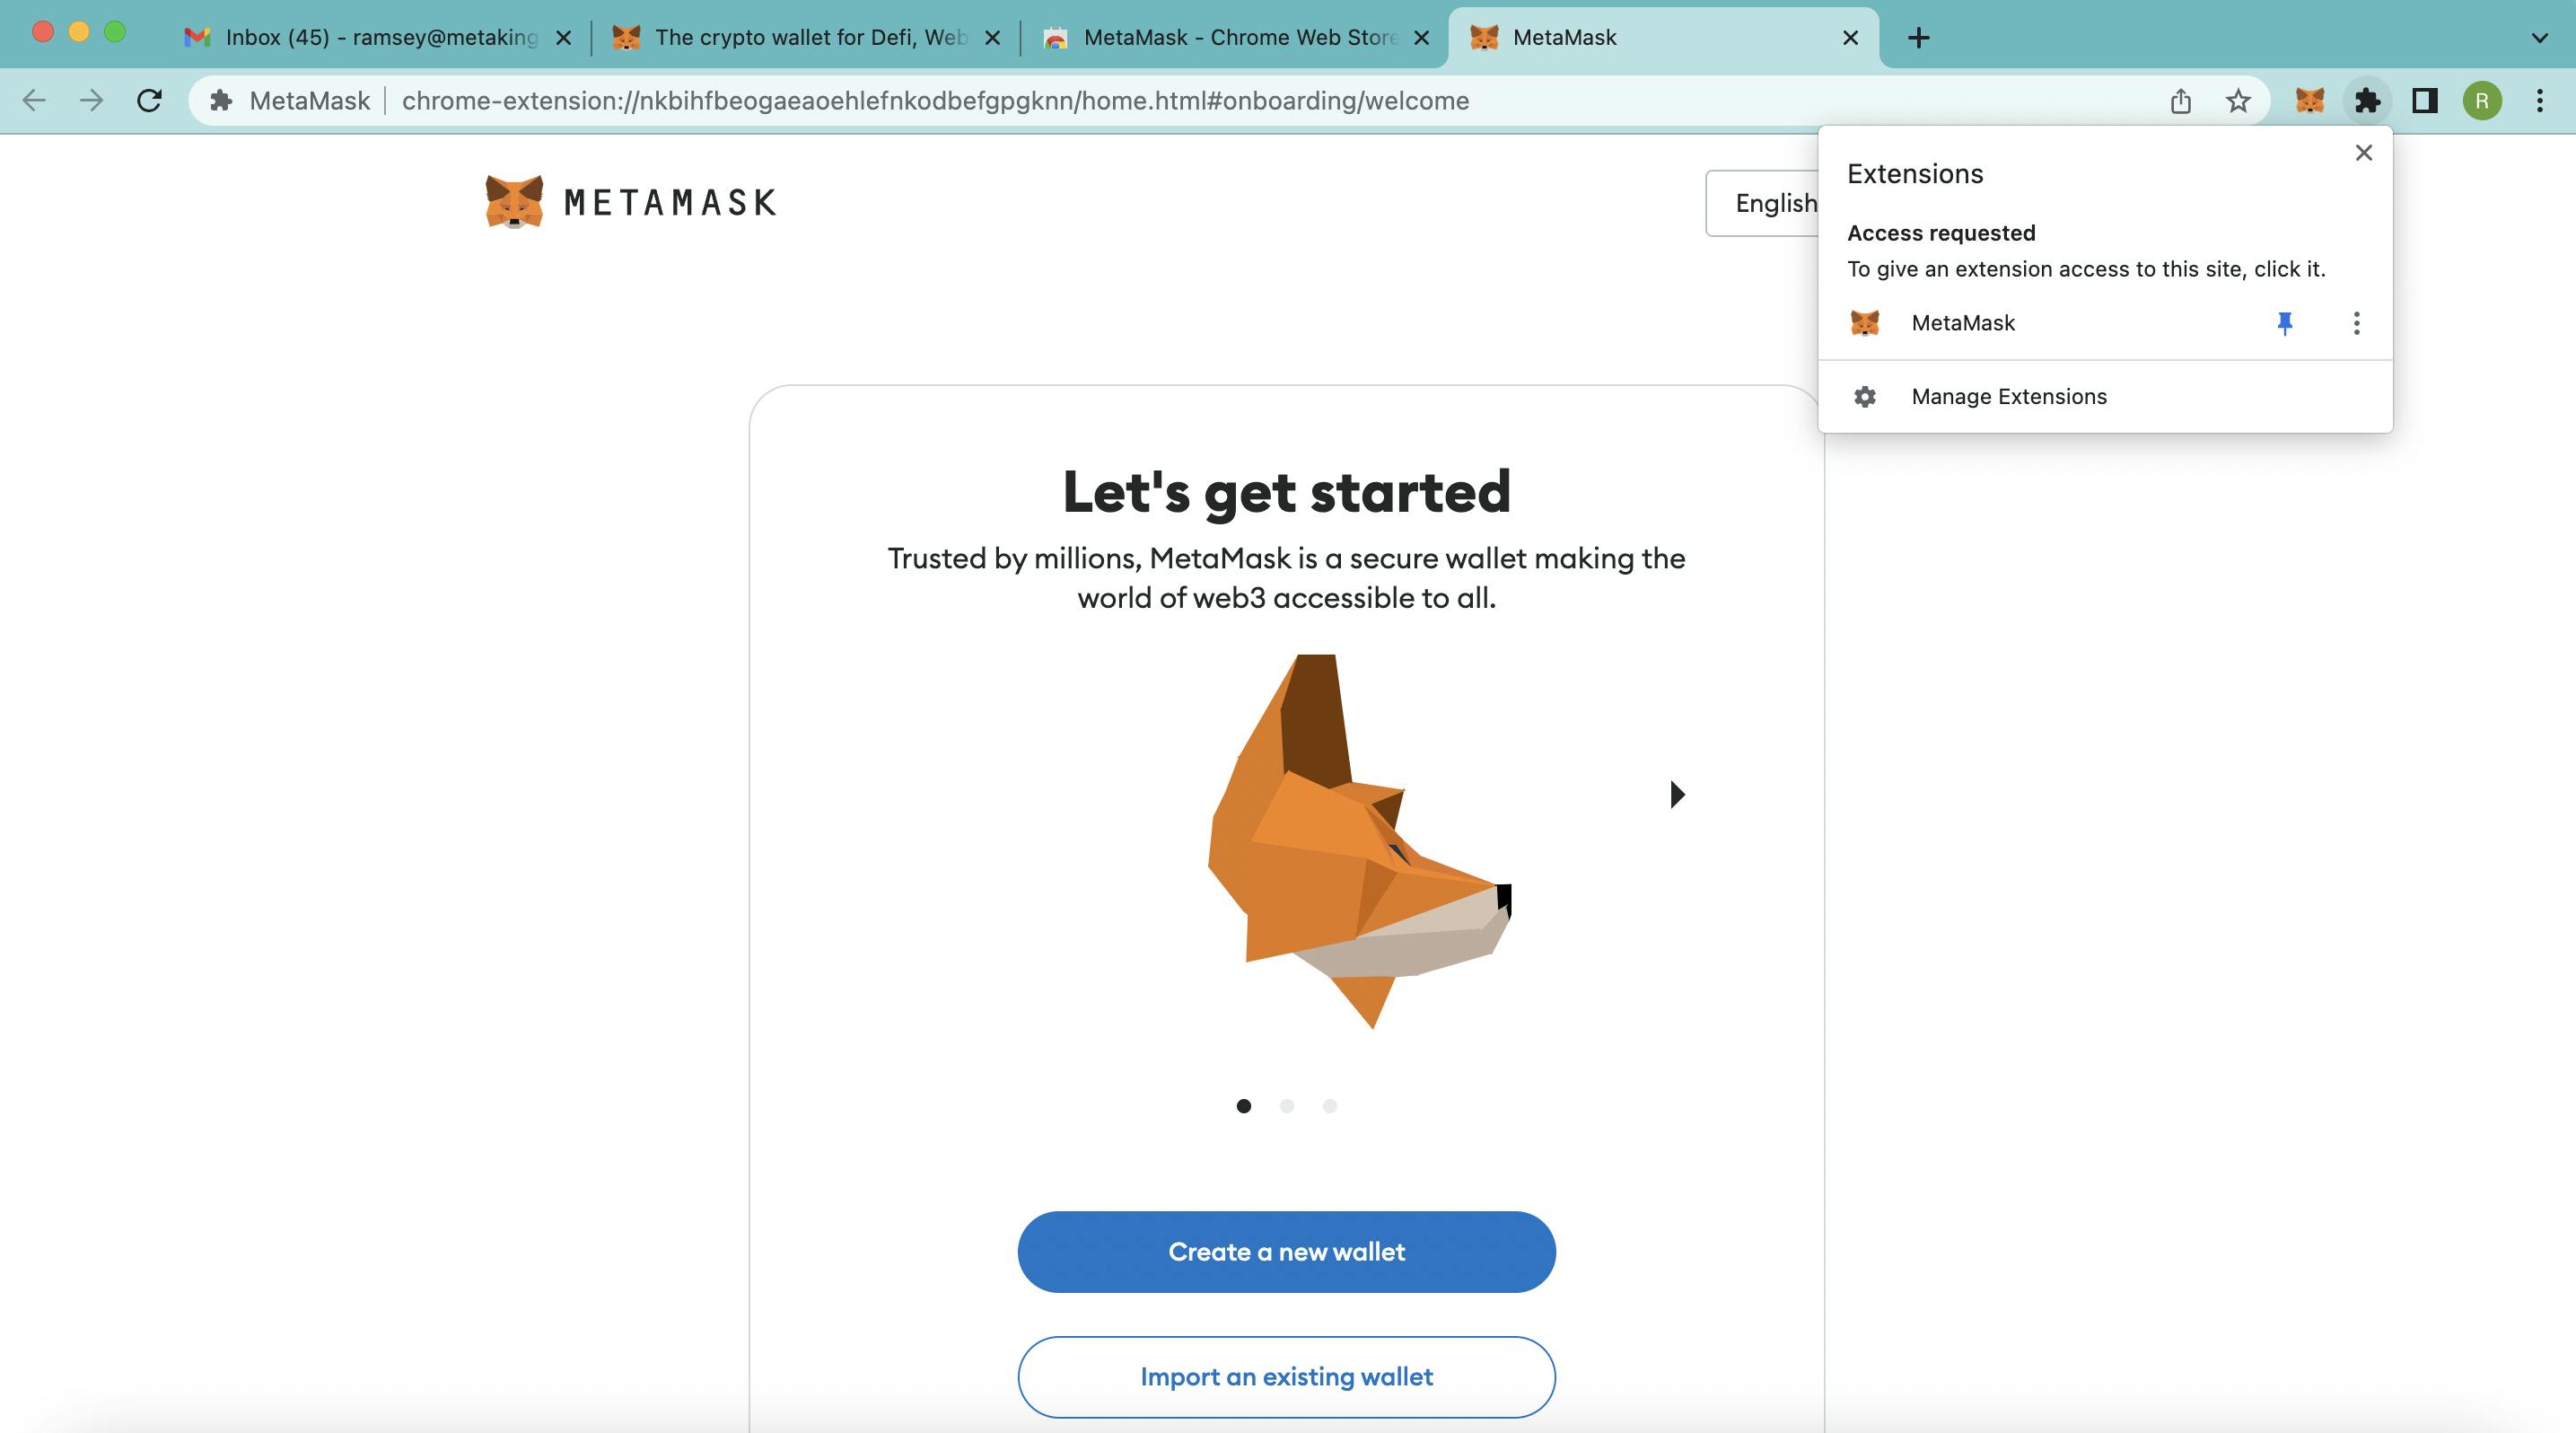
Once installed, you will be presented with 2 options, creating a new wallet, and importing an existing wallet. We will run through both here, starting with Creating a new wallet.
Clicking “Create a new wallet” will invoke a pop up - but fear not, it is just an optional opt in to supply data to MetaMask to help them improve the user experience. This is optional
Once past this, there are 3 quick steps left till your wallet is ready to go!
As with creating any personal account, a password must be set. This password allows you to access MetaMask on the device, and should not be shared with anyone.
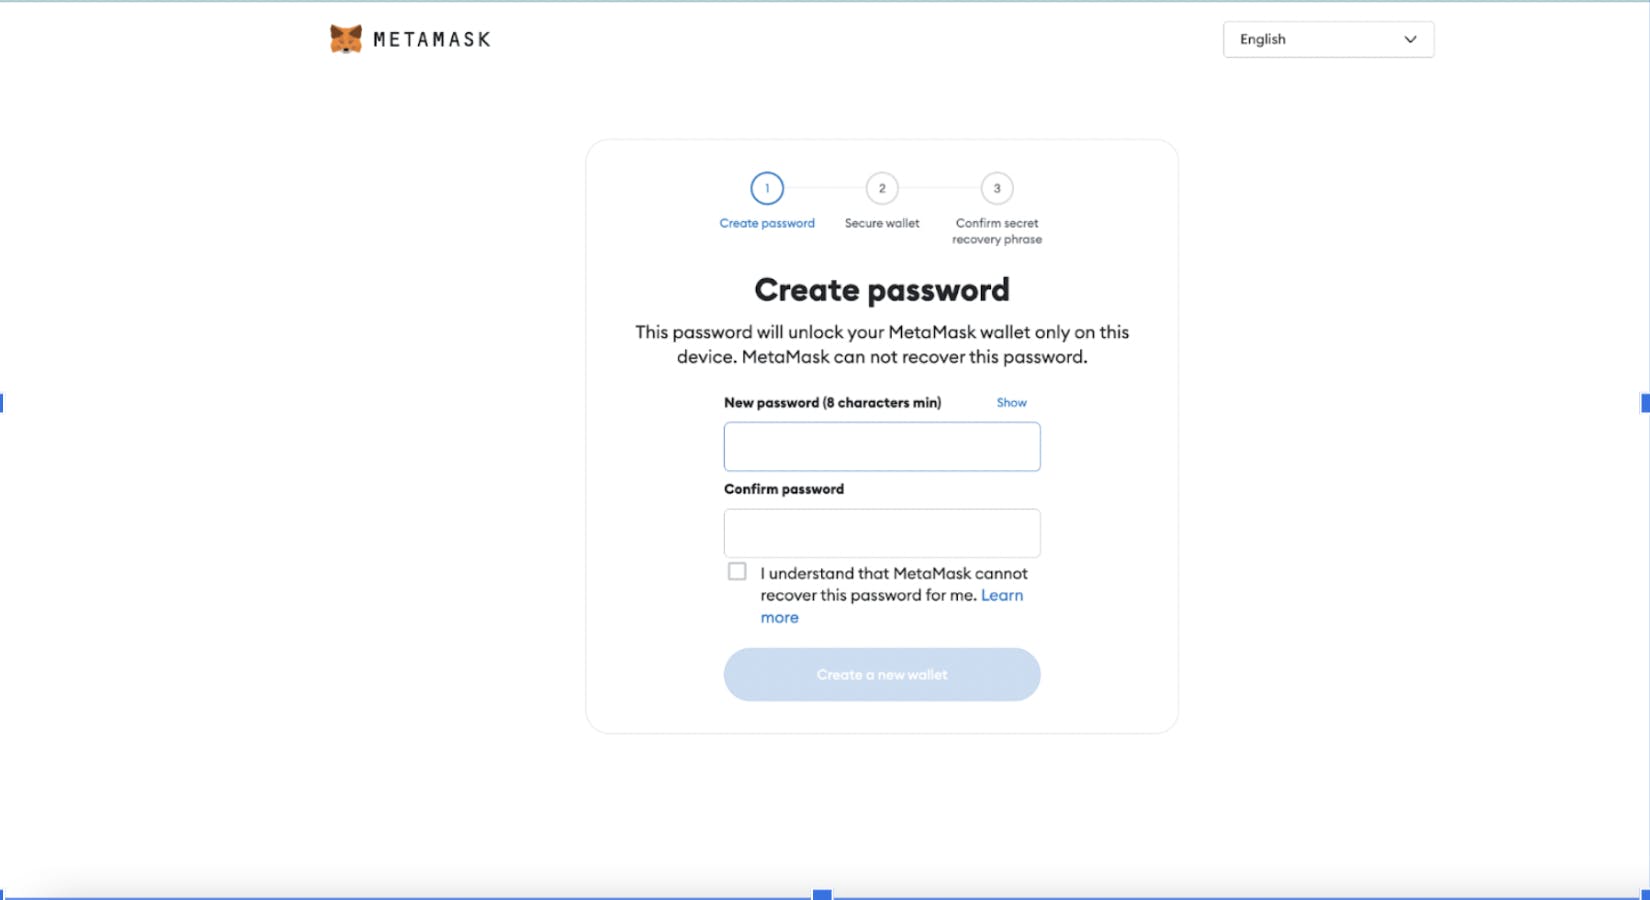
Once you have set your password, we suggest that you watch the short video on securing your wallet. Keeping your assets as safe as possible is imperative. It's only a minute and a half long, and worth watching!
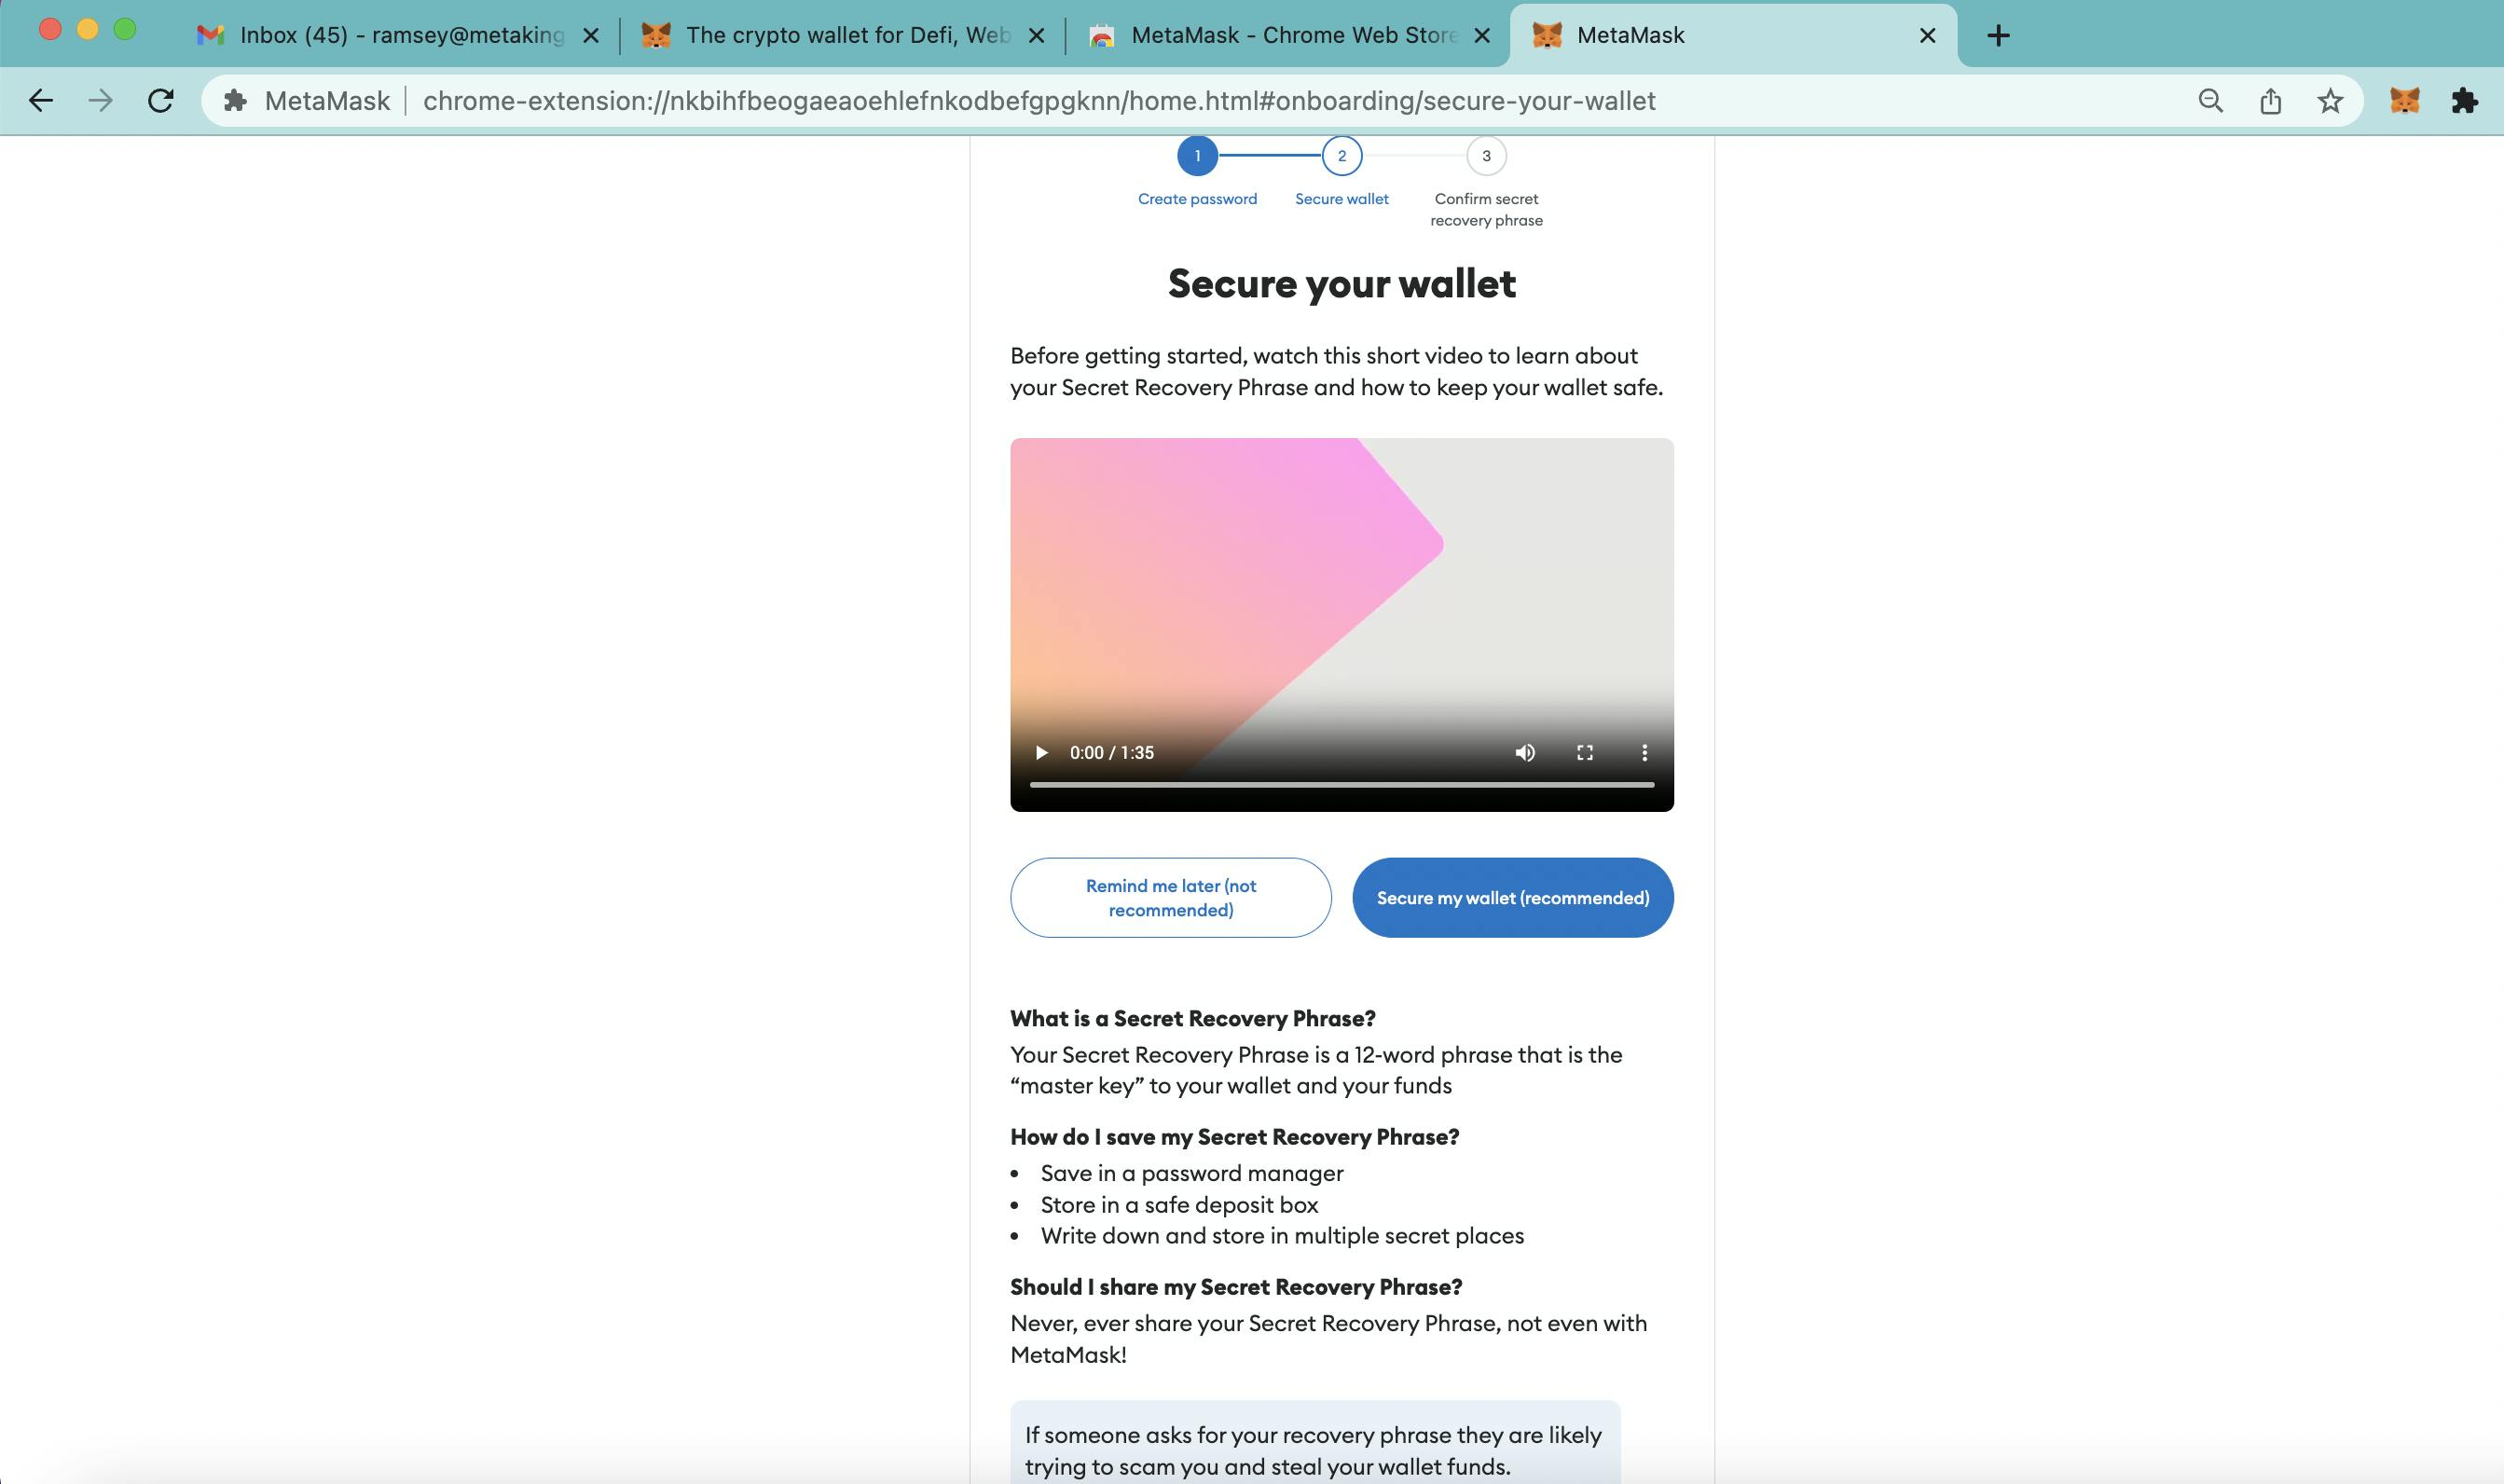
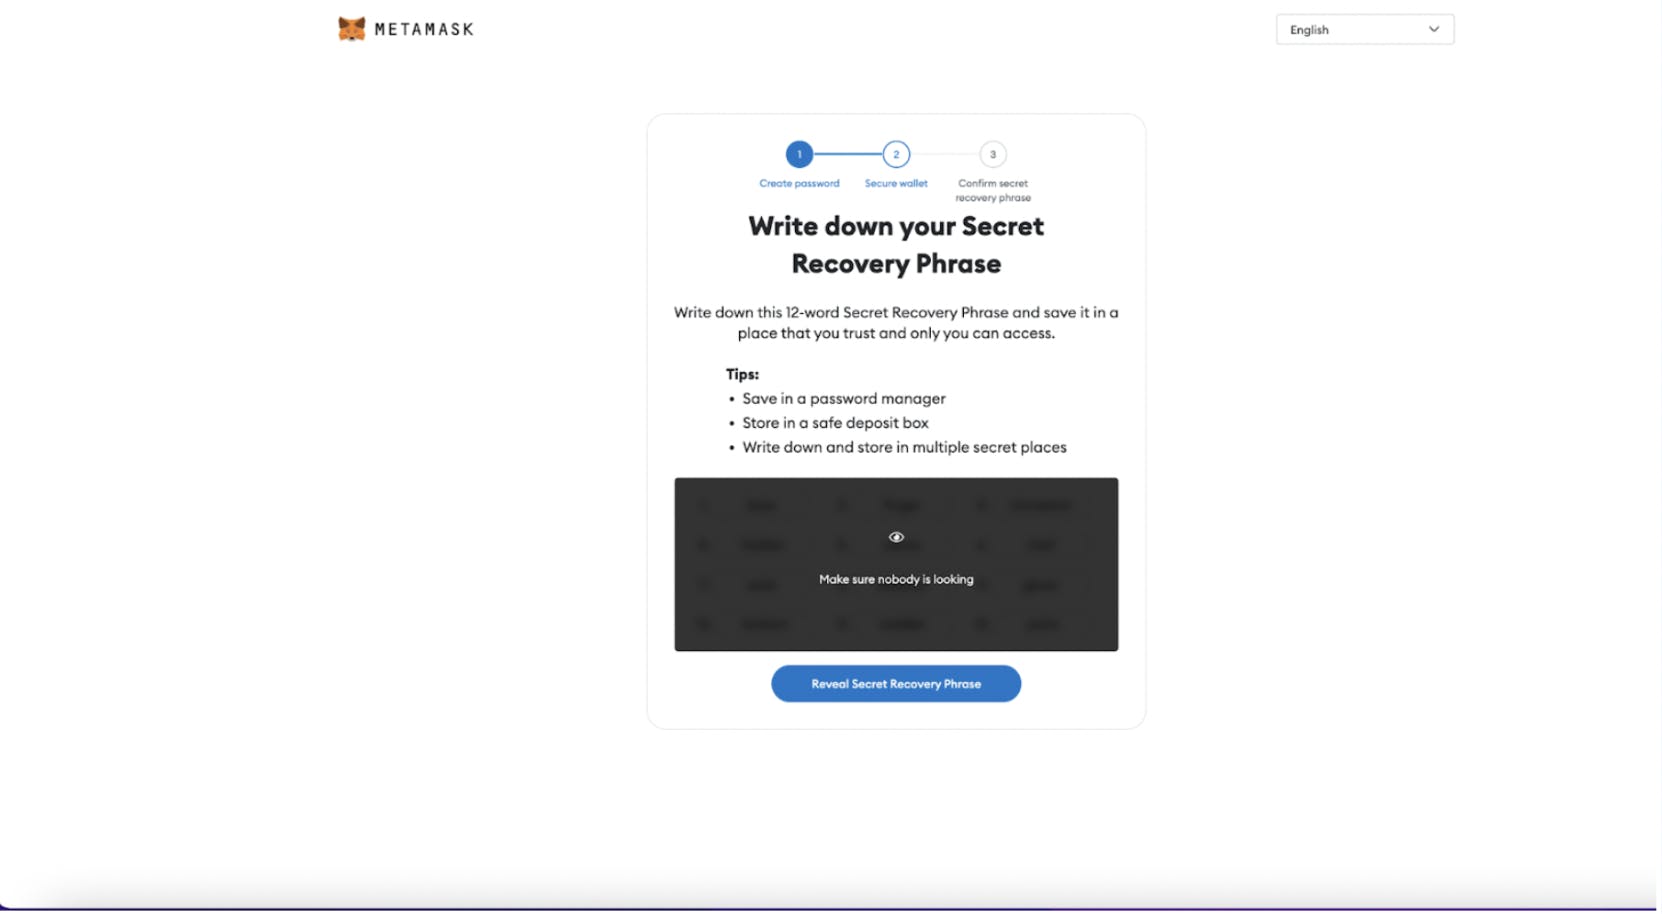
The last step is to save your recovery phrase somewhere secure, whether that be in a safe or a book that's up to you. This is the only way to recover your MetaMask wallet if you have forgotten your password, or you are importing a wallet from another device. The importance these 12 worlds hold should not be underestimated, they are the key to all your assets in the MetaMask wallet. Anyone who has access to these 12 phrases, has access to your assets, so please keep them safe.
Storing them the old school way - offline - will keep them safe from hacks and exploits.
And please, never, ever share your phrase with anyone!
Once you are ready, reveal the Recovery Phrase, and note down the phrases and the order and make sure they are firmly safe before moving on.
While digital ownership can offer many benefits, such as increased accessibility and control, it also comes with unique risks and vulnerabilities, such as the potential for hacking, scams, and fraud. Safety should be your number one priority, and is something only you can control.
PS: they are case sensitive.
You will then be asked to confirm them on the next stage
After that, you are all set! Your wallet is set up, and can go on to use the wallet to transfer, transact and save your digital assets.
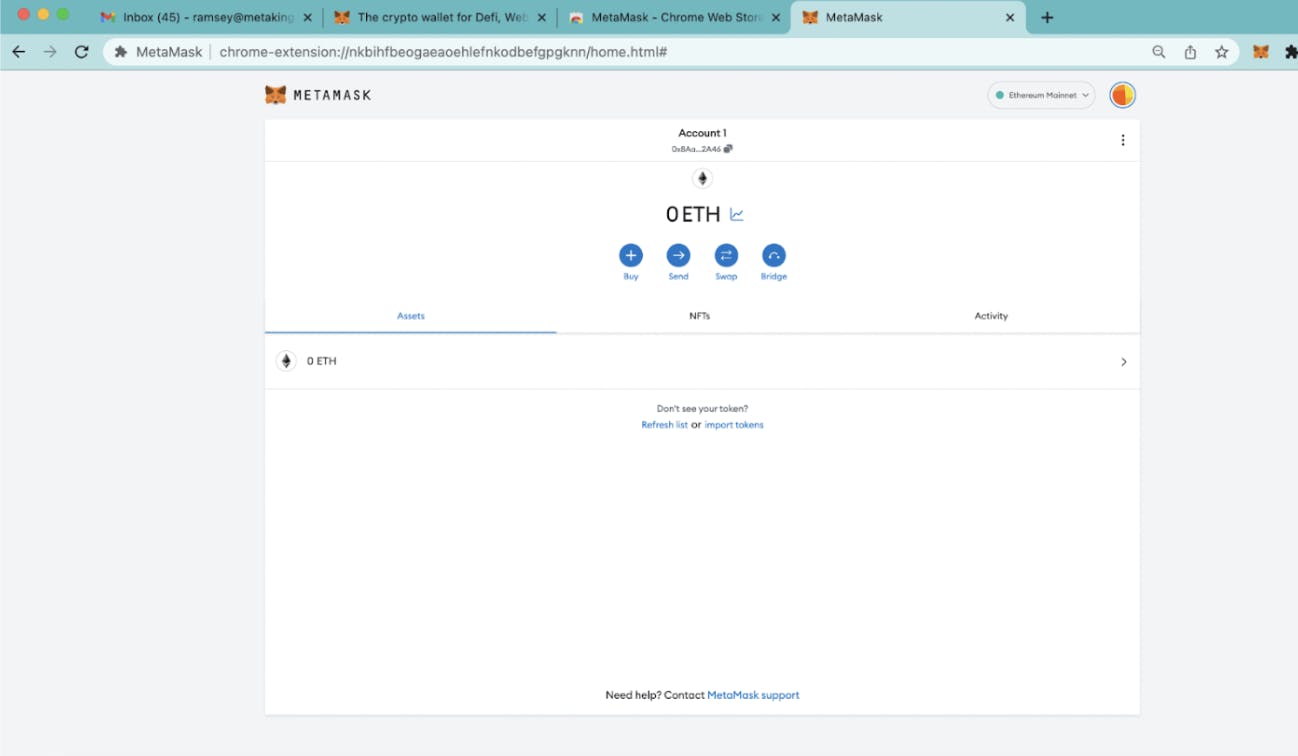
Your MetaMask wallet can be accessed via a full page or the browser extension, as portrayed in the image below
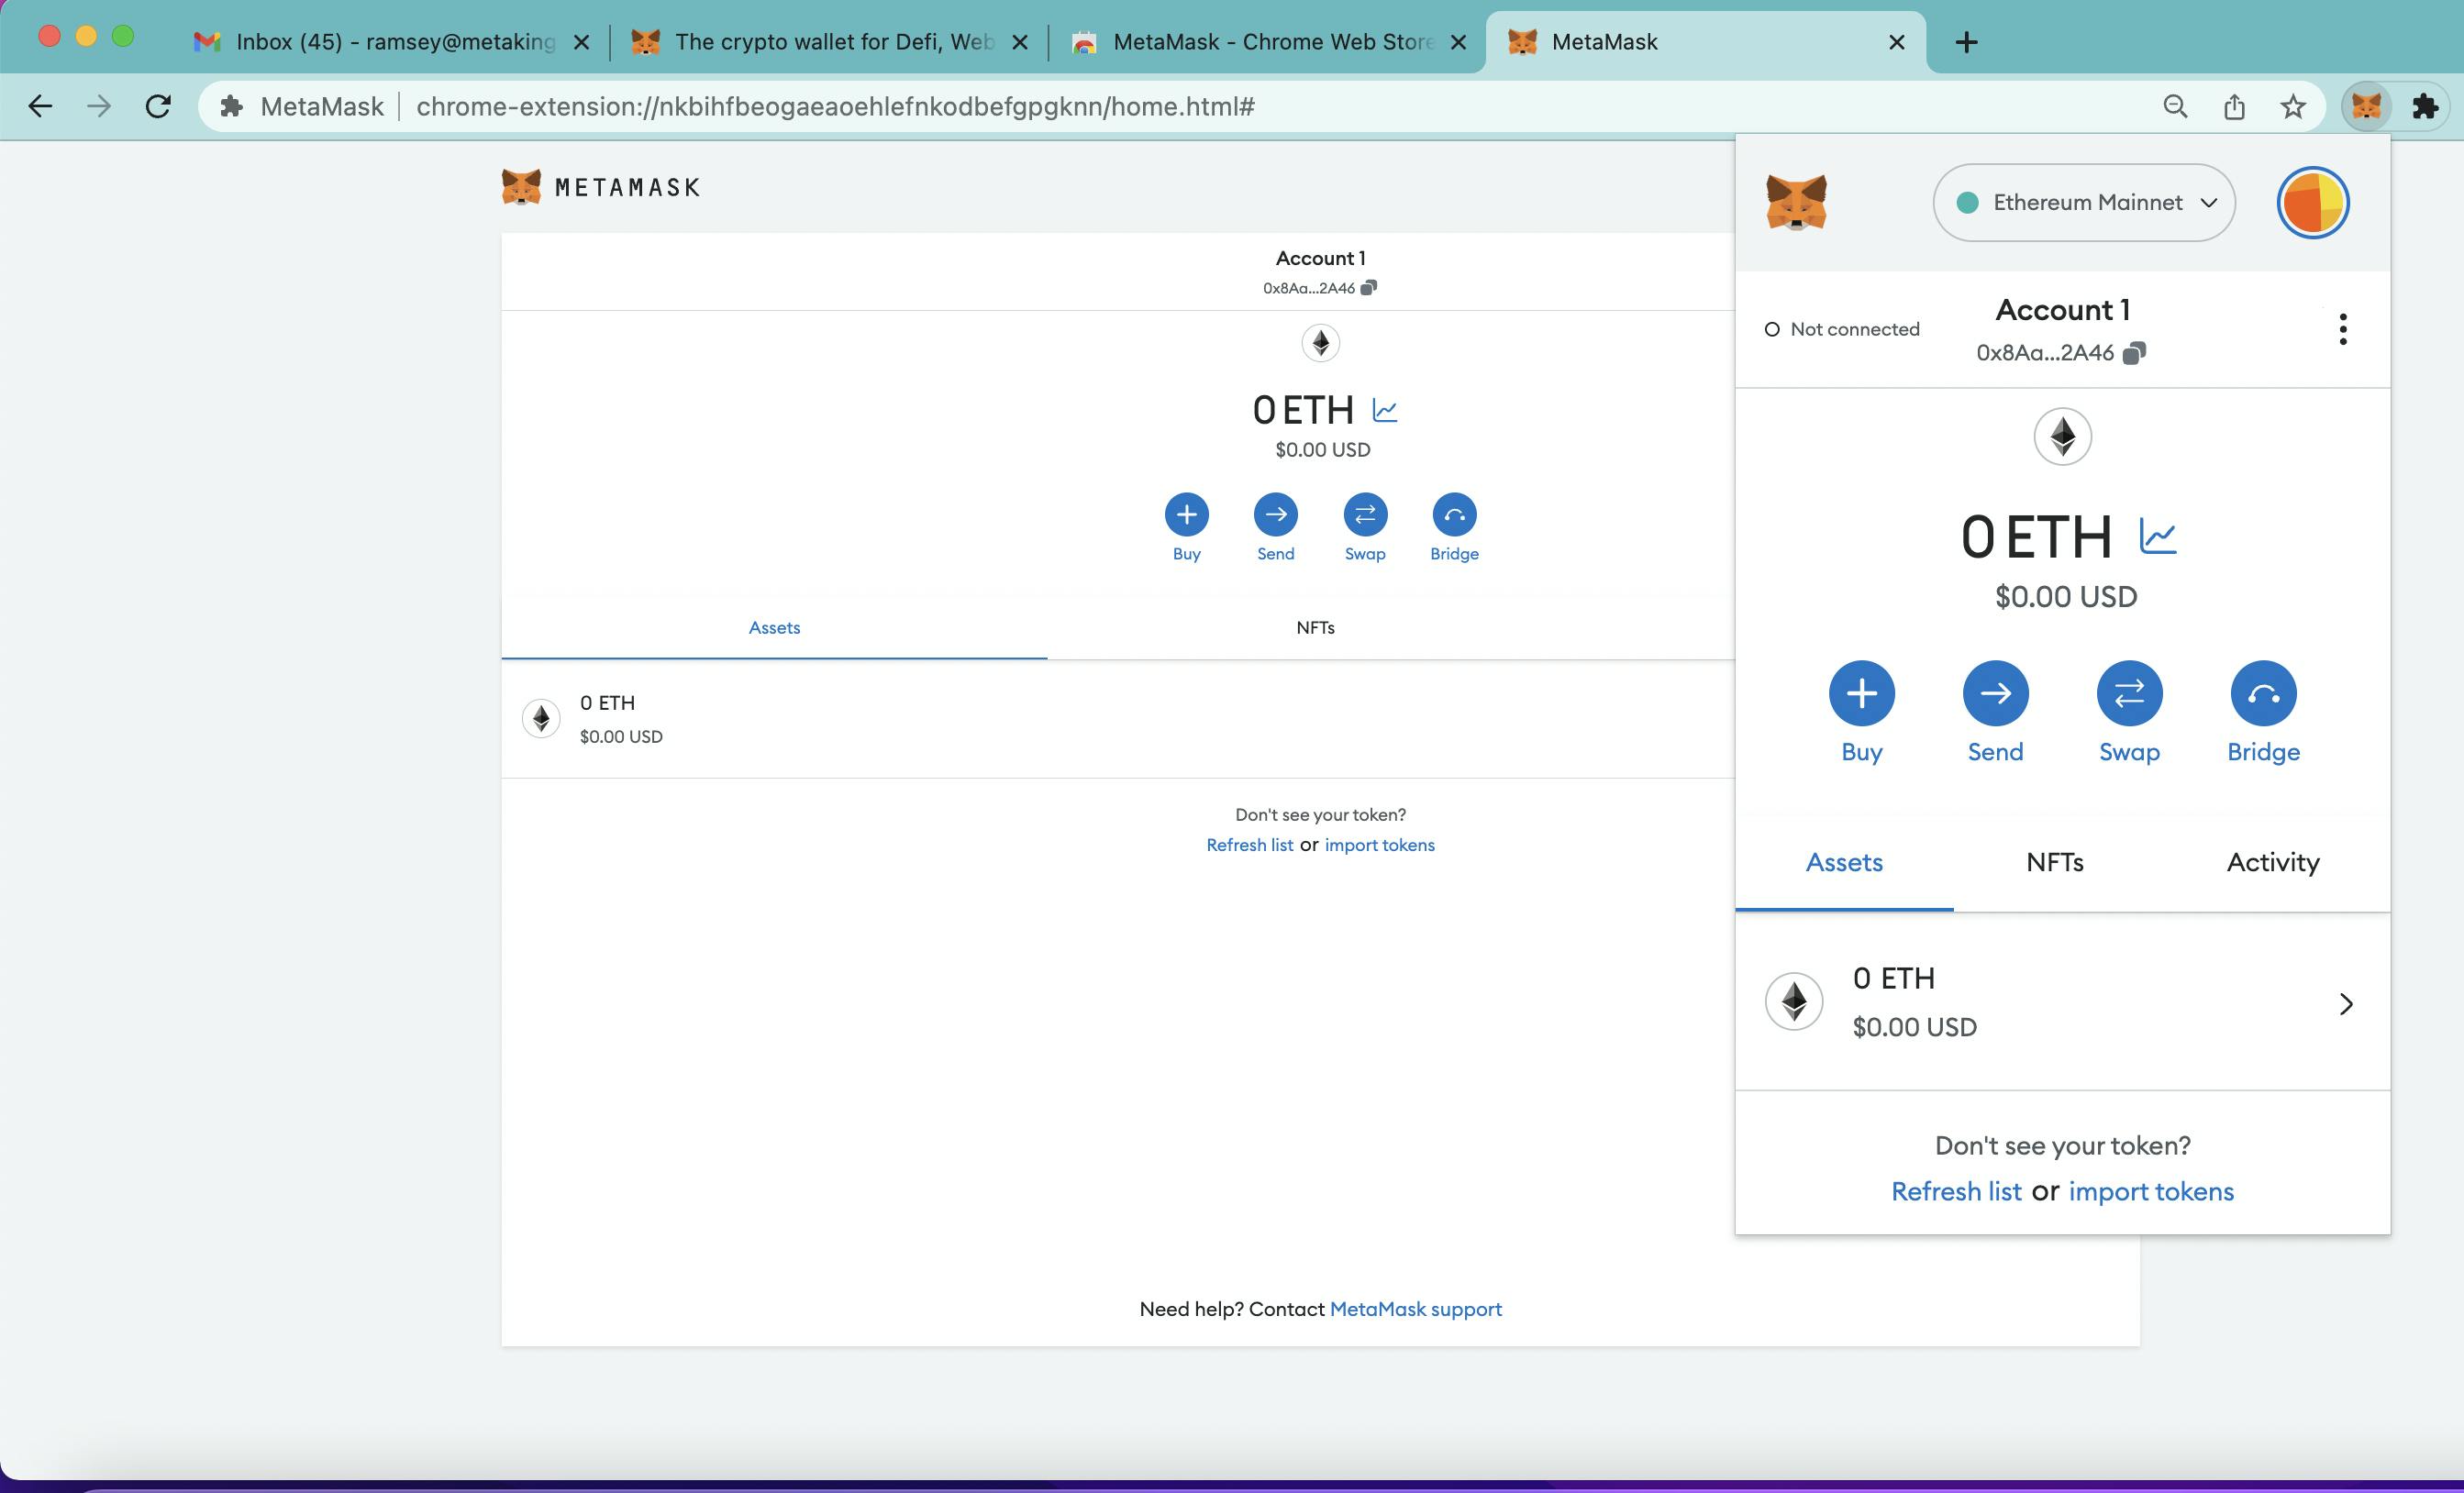
The 2 main tabs on the interface show your assets and your activity. The “Activity” tab includes all permissions, swaps, deposits and withdrawals that you have actioned, whilst the “Assets” tab shows all your assets (I know, intuitive), and this covers all your digital assets
Above the main tabs, there are 4 buttons, that provide you with different options:
These options all have different functionalities.
Note: full page view can be accessed by clicking the 3 dots on the top right of the widget, and selecting “expand view”.
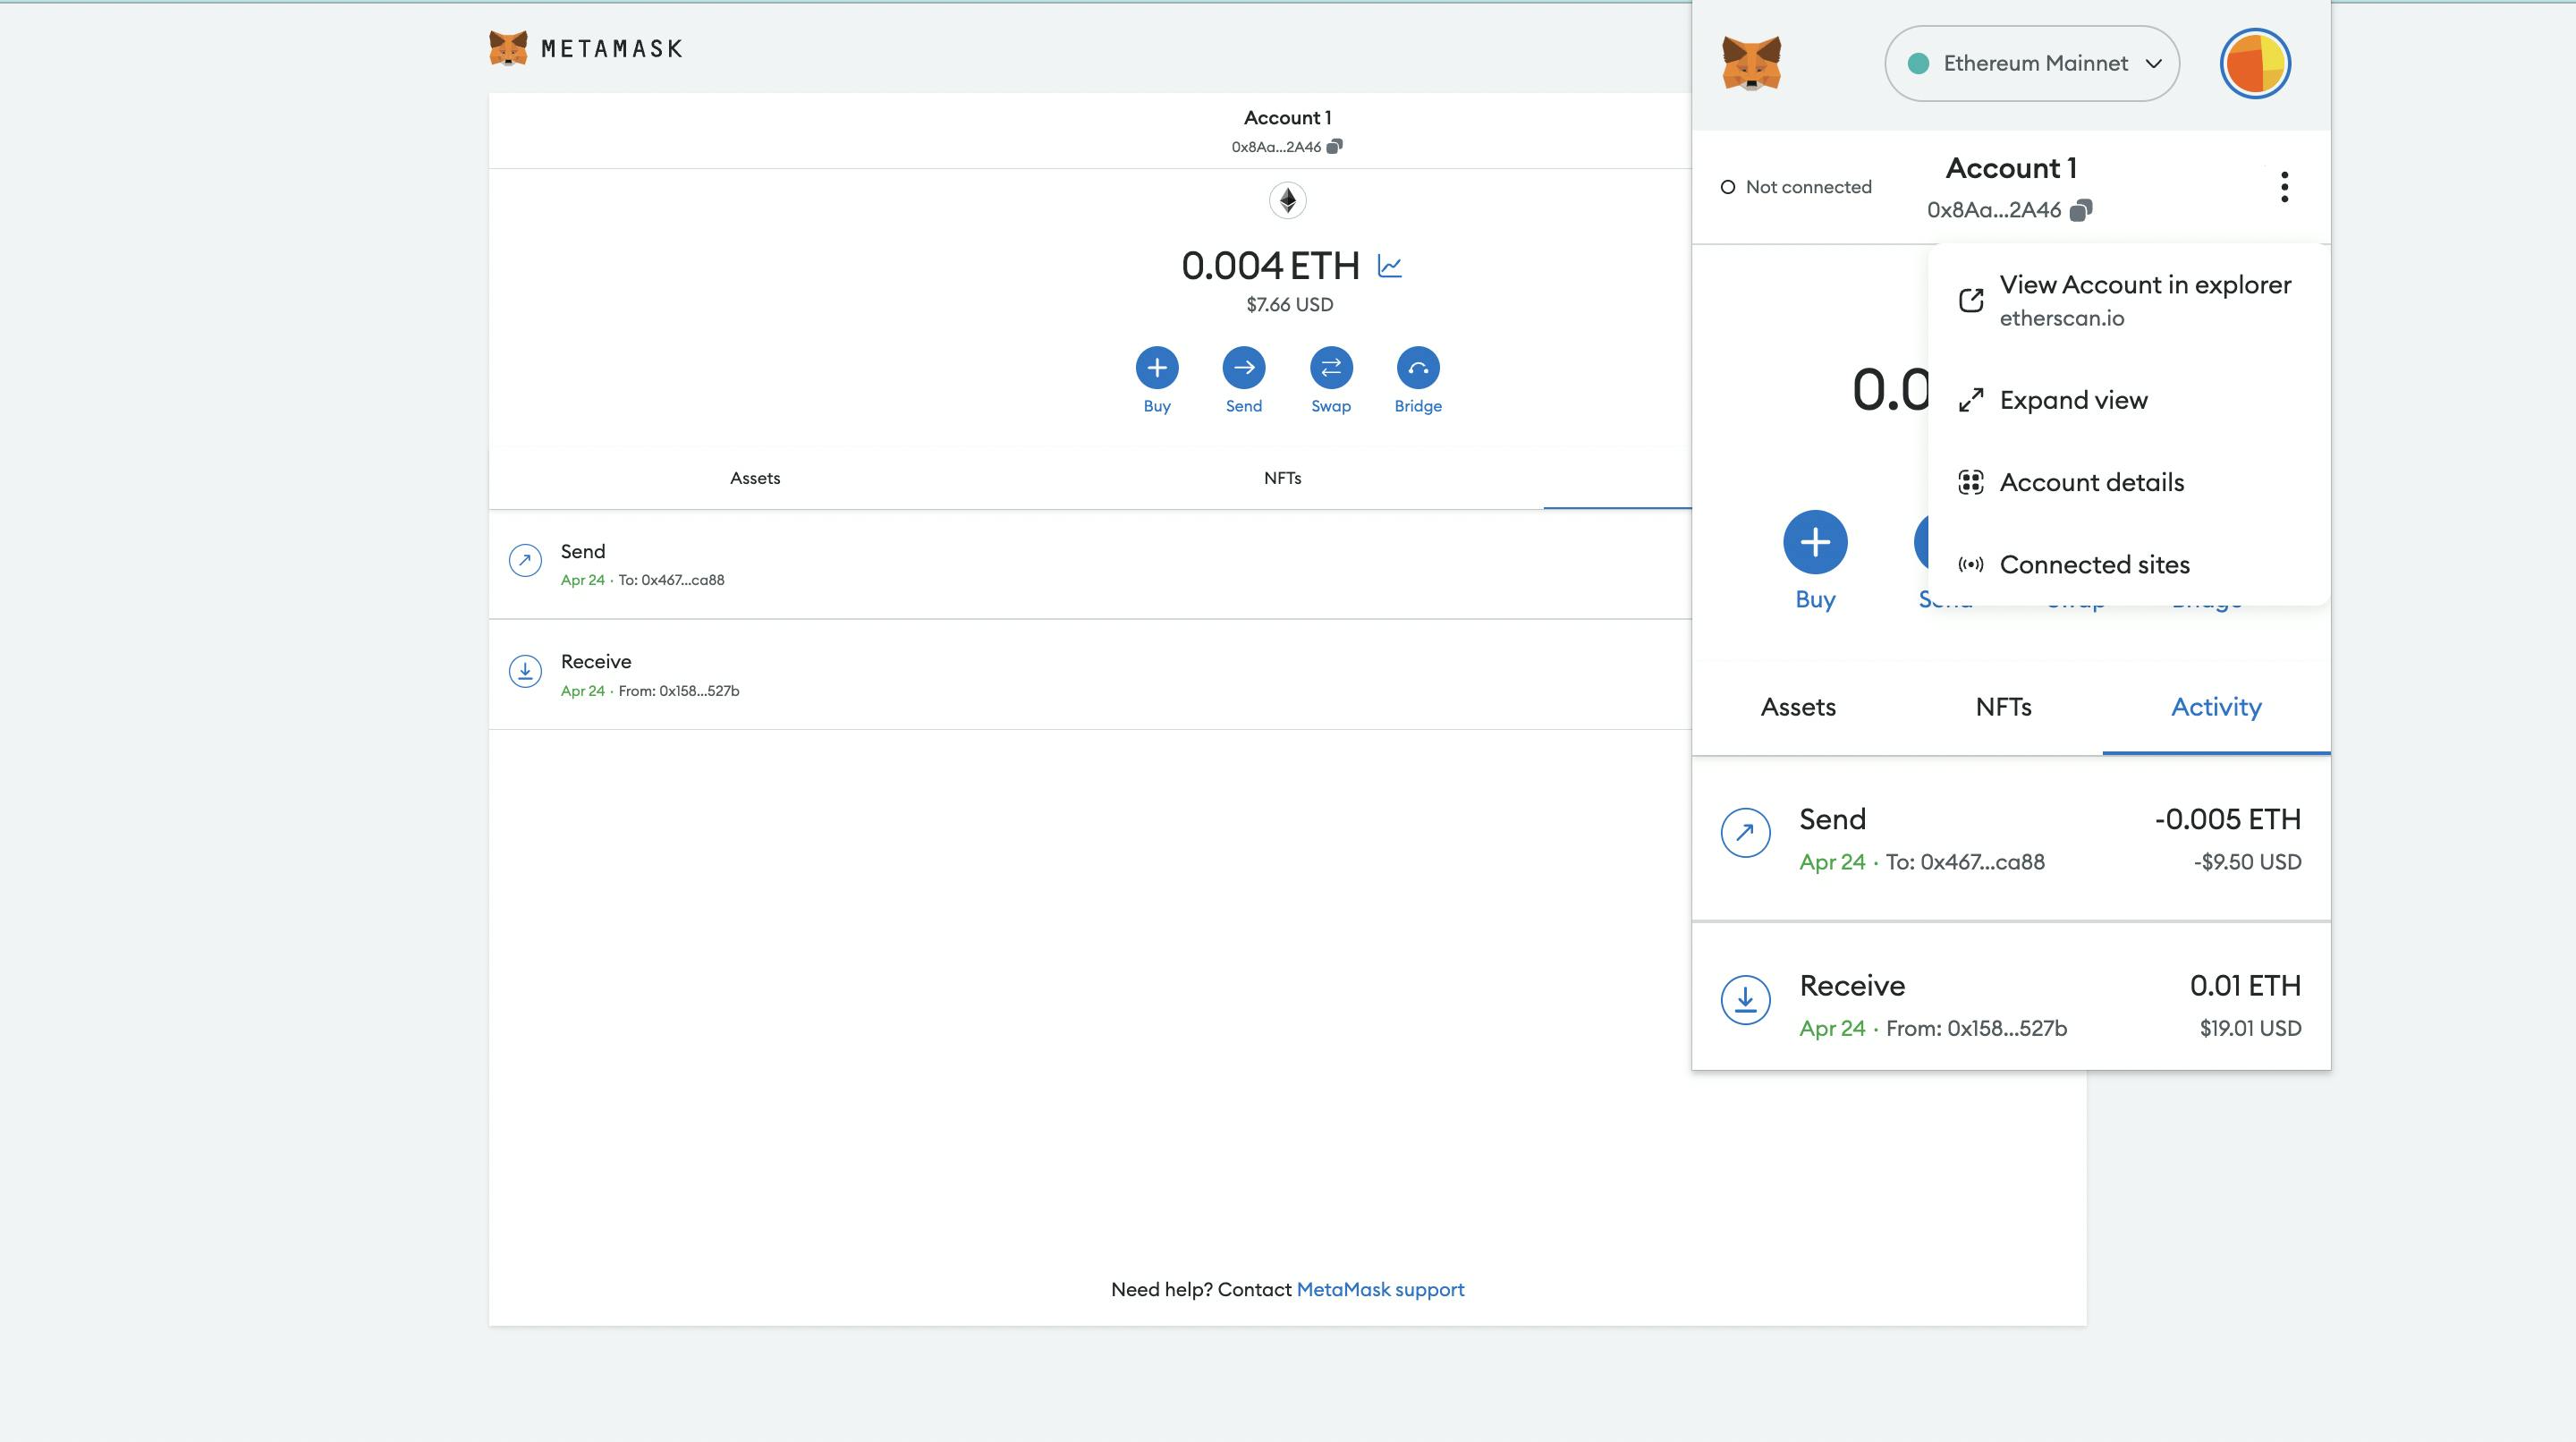
The next step in your web3 journey is to figure out how to fund your wallet! Of which there are a few ways to do this:
Depositing digital assets straight to MetaMask is the easiest way for newcomers to the space to fund their wallet.
Open up your MetaMask wallet and hit the “buy” button, you should be taken to the following page, there you will be able to choose your payment method. Once selected you can enter the desired amount and select the quote which suits you, and continue.
There is a minimum deposit amount which is different for each method, and as of right now, are the following:
Once complete, you will then be shown this screen, where you can enter your email, a code will be sent over to you, which you’ll input on the site.
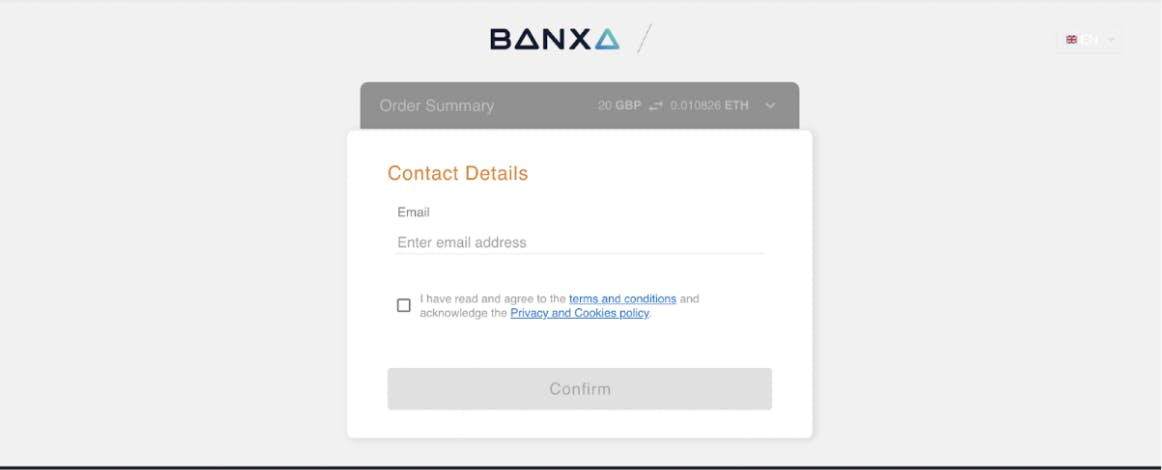
This is the easy part. Simply follow the steps to get yourself KYC verified. This process is a one time thing, once completed, future deposits with the provider you deposit with will not require verification. If the next deposit goes through a different quote provider, you will have to KYC with them as well.
Once the verification is complete, your funds should be transferred!
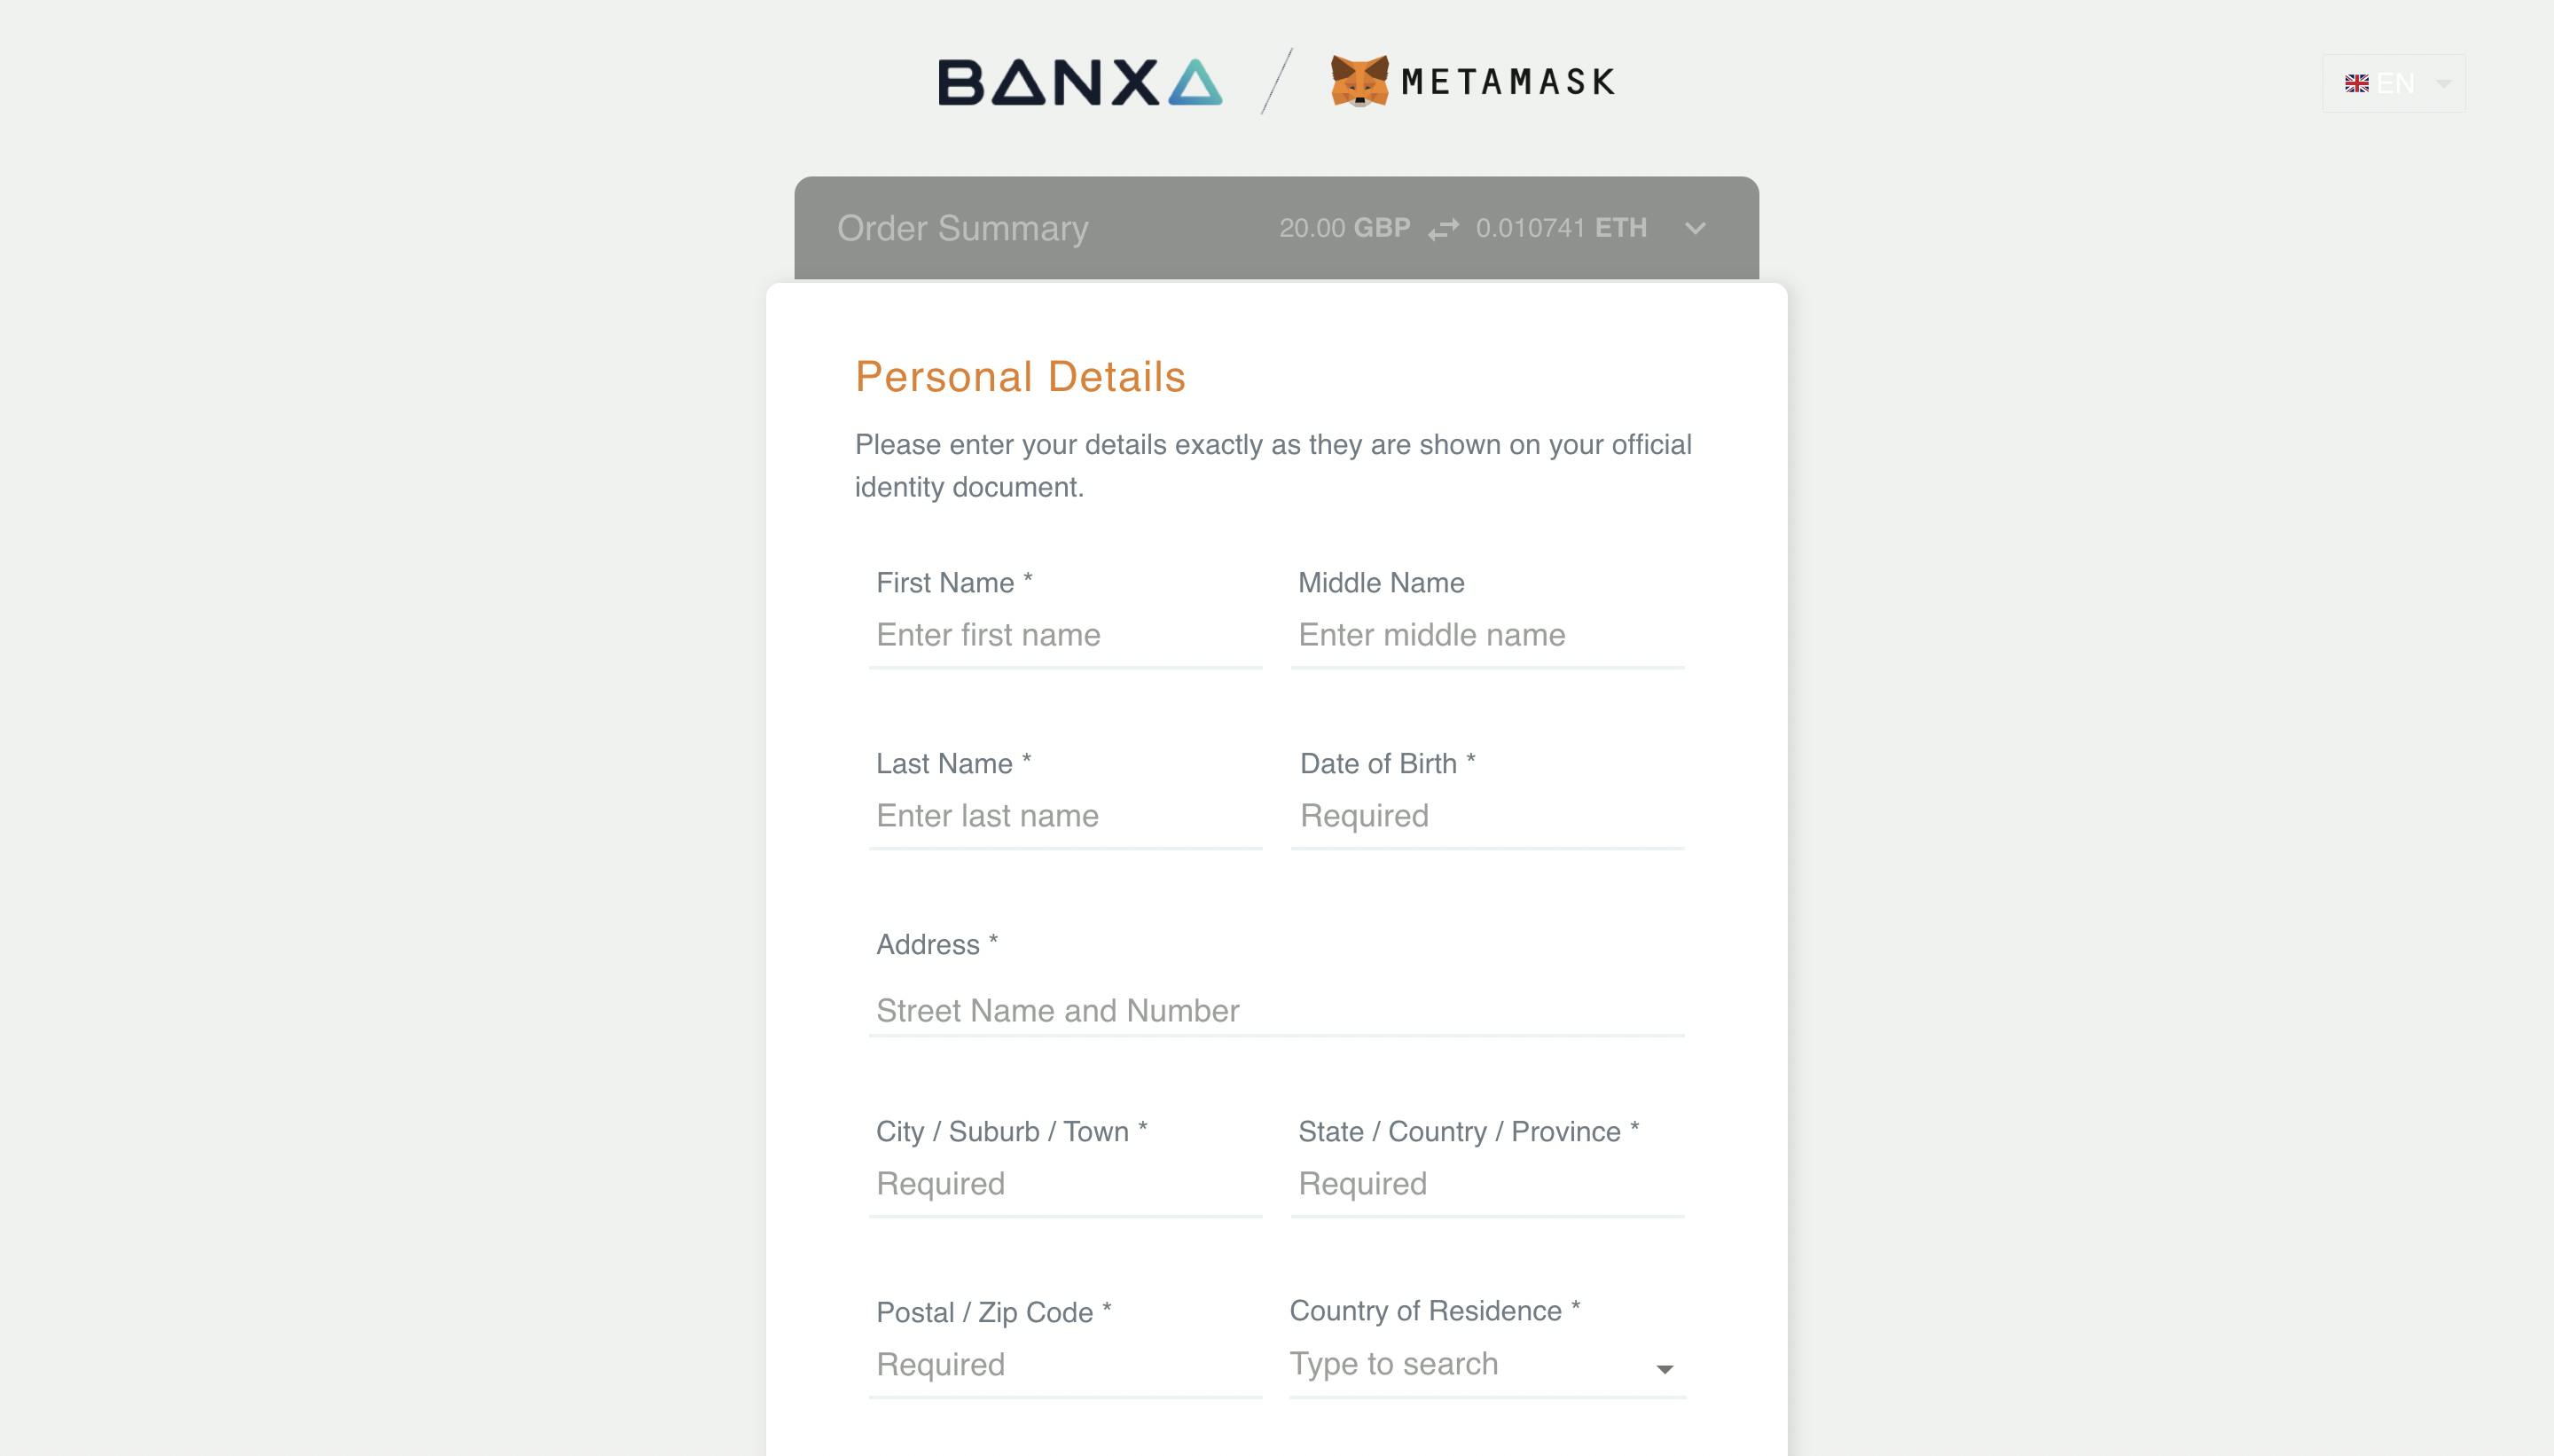
Other than on-ramping funds straight to your wallet with the Buy feature, you can transfer funds to your MetaMask wallet from a Centralised Exchange (CEX), or from another one of your hot wallets to MetaMask.
If you are using an exchange, you will need to first ensure that the asset you are trying to transfer is on a network that is compatible with MetaMask - the ChainList from Cointools is a great resource to help you identify whether the chain is compatible.
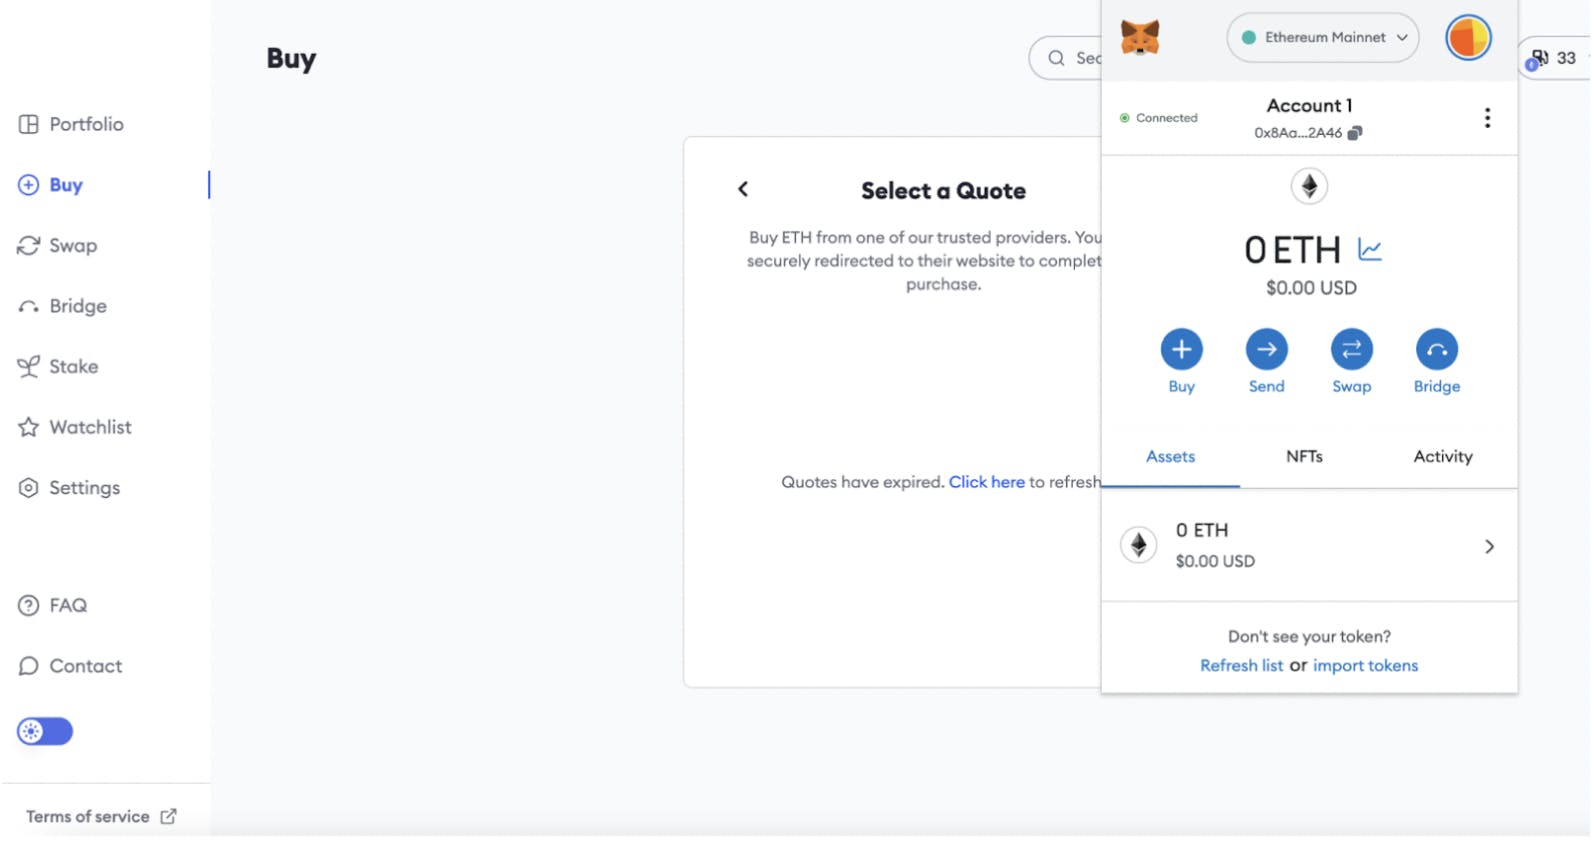
Once identified, select the asset you want to withdraw, copy in your MetaMask address by clicking the address situated between the Account Name and Balance, and pasting it in the “Withdraw Address”. Select the desired network for transfer and send your transfer request! Be very careful with this string of numbers and always make sure not to accidentally add or delete anything when copying and pasting.
If all the steps are followed correctly your funds will be transferred to your MetaMask wallet. Generally all the steps are easily laid out for you on the withdrawal process
With your funds now in the wallet, you can transfer them to Immutable X, and get a hold of your first BLOCKLORDS Hero!
14.02.2025
news
4 mins read

14.02.2025
news
4 mins read
How does AI reshape the future of strategy games?
14.02.2025
news
2 mins read

14.02.2025
news
2 mins read
Blockchaingamer.biz on AI agents in BLOCKLORDS
11.02.2025
news
4 mins read

11.02.2025
news
4 mins read
Age of Intelligent Heroes Begins!