14.02.2025
news
4 mins read
14.02.2025
news
4 mins read
BLOCKLORDS ushers in the AI era
How does AI reshape the future of strategy games?
29.04.2023
news
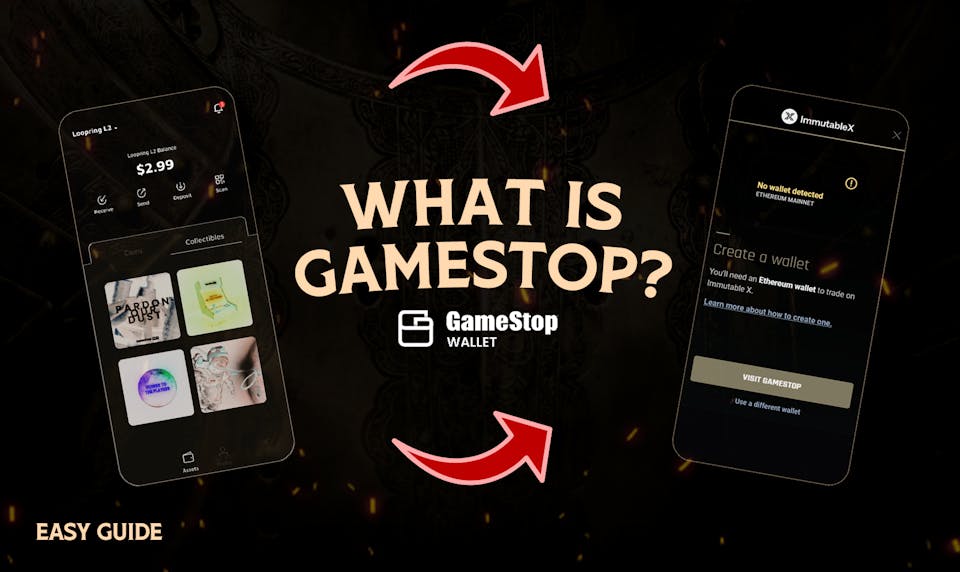
As you may have seen, GameStop has released their own Web3 wallet - the GameStop Wallet, which is compatible with BLOCKLORDS. Today we are going to break down what the wallet is and how to set it up! This guide will be sectioned up, between how to actually set up the wallet, and how to fund the wallet.
GameStop wallet is a web3 hot wallet, similar to MetaMask, meaning if you have an understanding on how MetaMask works you should have no problem navigating through GameStop wallet! The wallet is great for managing your tokens & NFTs, accessing decentralised apps on Ethereum, facilitating fast transactions on the supported networks, and giving you complete control over assets as a self-custodial wallet. The GameStop wallet is only compatible with 3 networks at the moment:
The main difference between the GameStop wallet and MetaMask, is in the functionality and compatibility. MetaMask has been around for much longer and has a lot more to offer in terms of features and support. At the moment, the GameStop wallet's functionality is limited to the Ethereum Mainnet, Loopring and Immutable X networks, meaning you can only transfer tokens and assets compatible with those networks. MetaMask on the other hand, is compatible with any EVM chain, which just means they share the same technology, the Ethereum Virtual Machine - check out the list of compatible chains!
So if you wish to participate in Polygon events make sure to get yourself a MetaMask wallet and connect to Polygon with it. If you don't know how to do that, check out our guide to creating a MetaMask wallet.
There are a few steps to setting up the GameStop wallet, following this guide will make it very easy to do so.
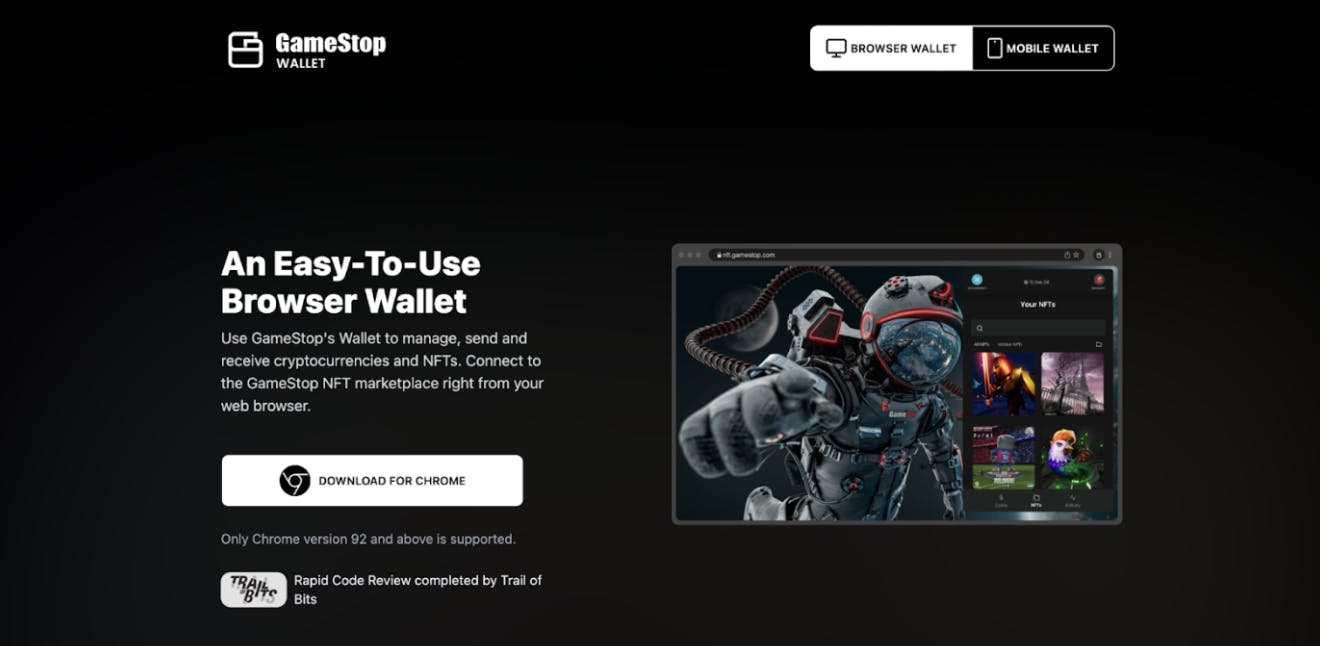
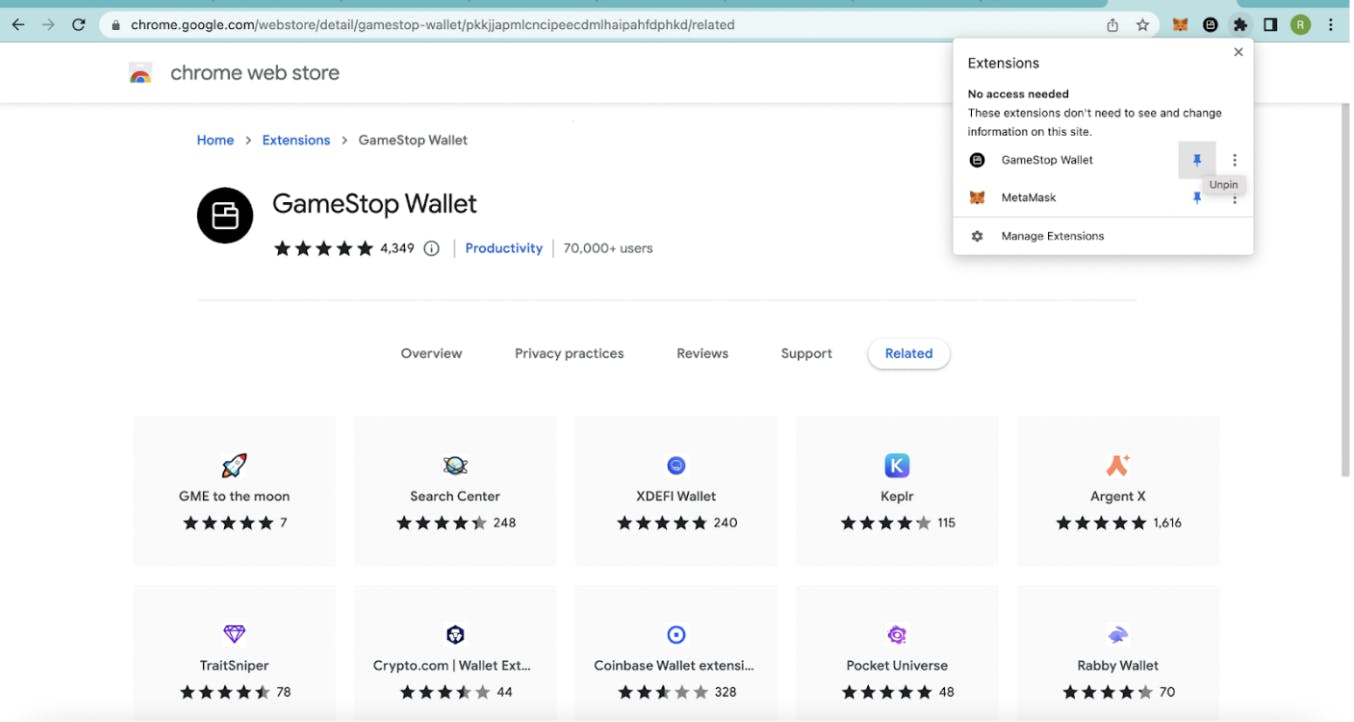
Hit download for Chrome, and then add to chrome once you reach the chrome web store!
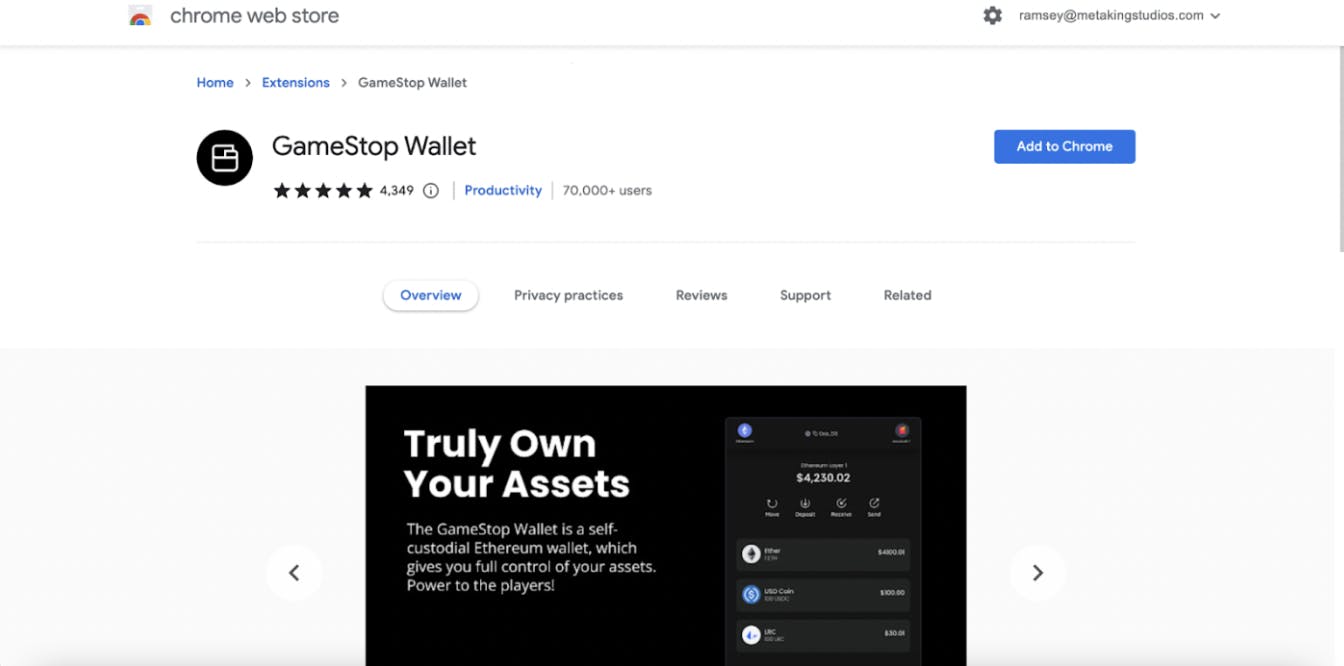
Once done, you should see the black icon appear in the top right, you will know it has been added.
To ensure it stays pinned, hit the puzzle icon, and click the pin so it is blue, and your GameStop wallet extension will be added to the browser.
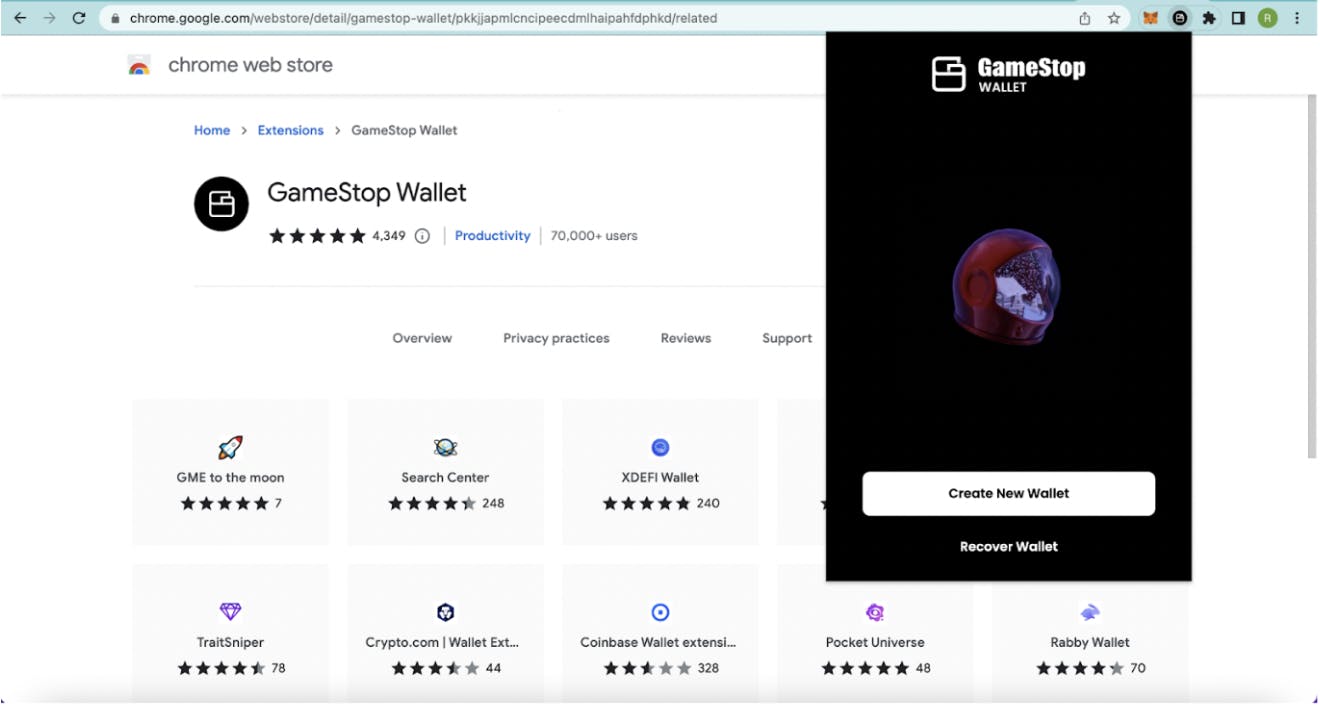
Once installed, the steps are similar to the setting up the MetaMask wallet. First you must select “Create New Wallet” (we will show you how to import a wallet later)
Once you select to create a new wallet, and agree to the terms and conditions, you will be met with the infamous, secret recovery phrase section! Save your recovery phrase somewhere safe, and proceed to enter in a unique password. Your safety relies on keeping this information, so make sure to never share it with anyone for any reason!
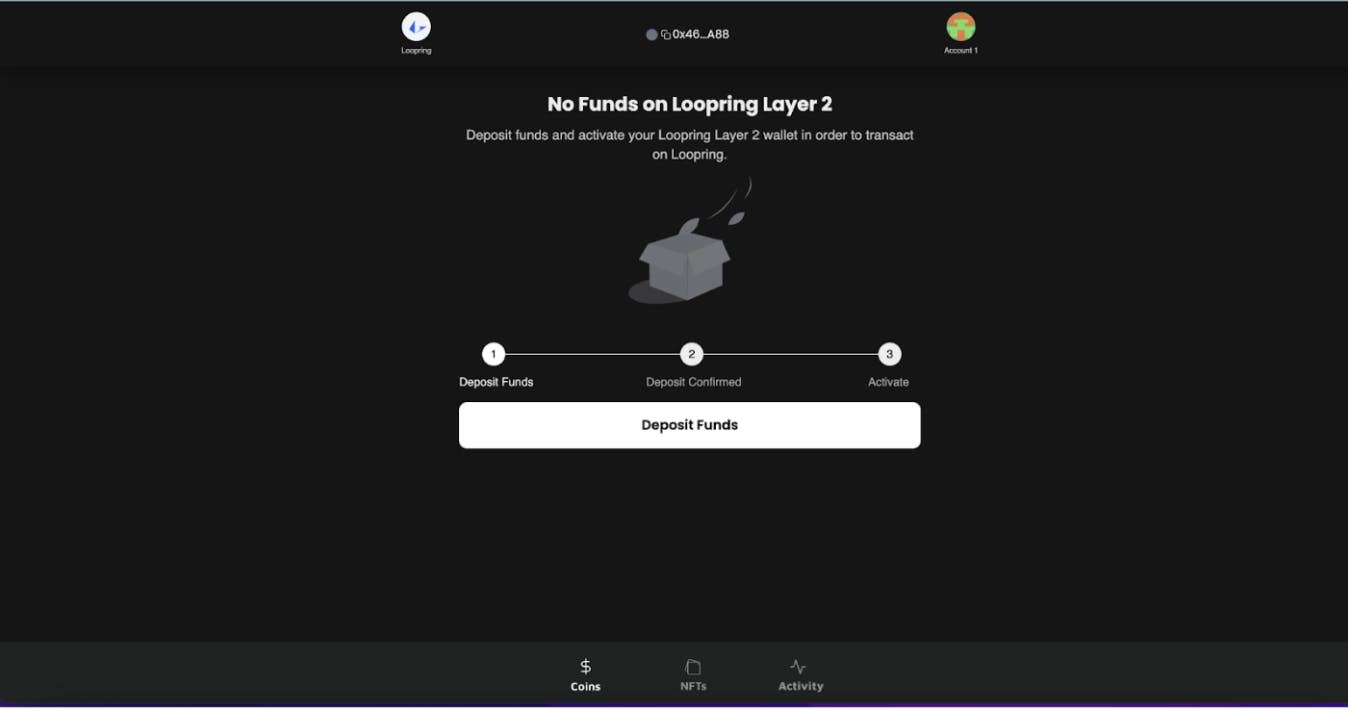
Depositing funds may seem tricky but it’s not! Here are the 3 main ways to do it in the GameStop wallet.
Here’s a run through of each method.
This is the easiest method to fund your wallet if you have never used a web3 wallet before.
First, Select the network you’d like to deposit to. If you are going to be using the funds to play BLOCKLORDS, then select the Immutable X network. This can be done by clicking the icon on the left of the wallet address, and then selecting the network.
For the purpose of this guide, we will deposit to Immutable X, as we can then easily go and play BLOCKLORDS afterwards!
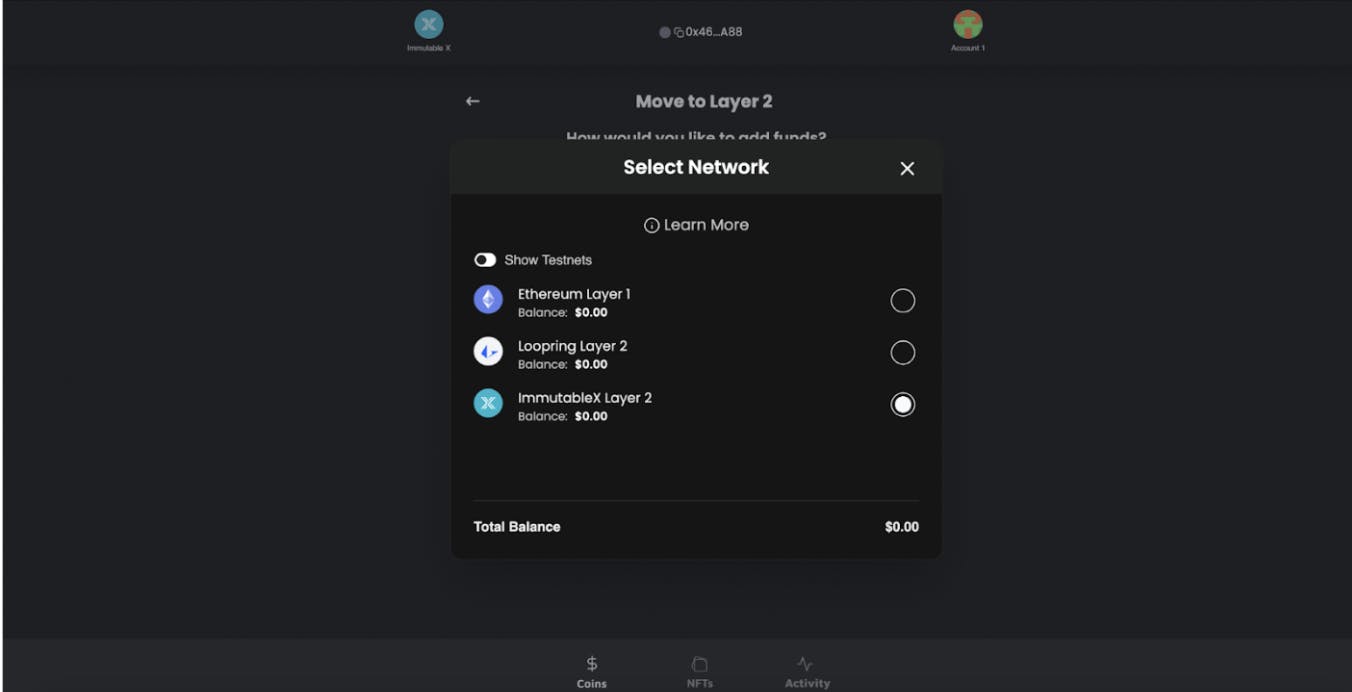
Second, select the first option in the menu. This will show you which on-ramping providers you can choose between. Unless you are an on-ramp nerd, it shouldn't make a difference which you use.
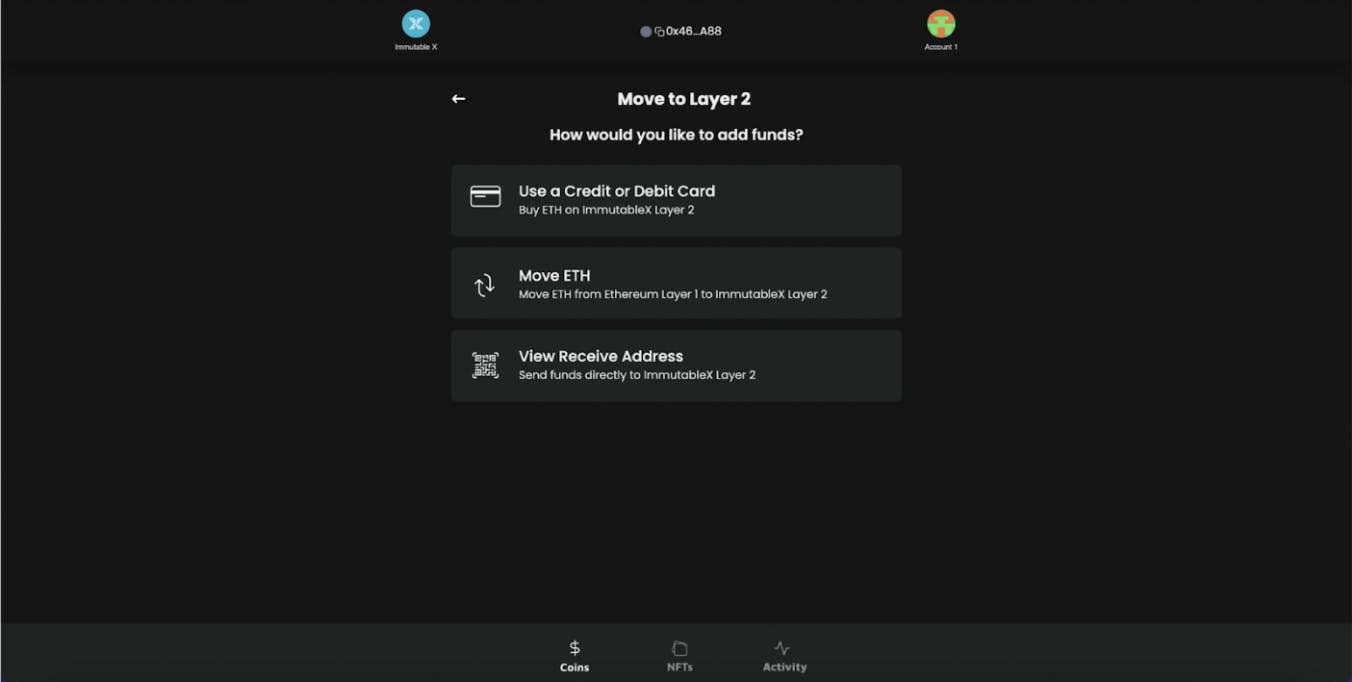
Third, input the desired amount to deposit, and then your email address. Once that's done you will receive a code to input.
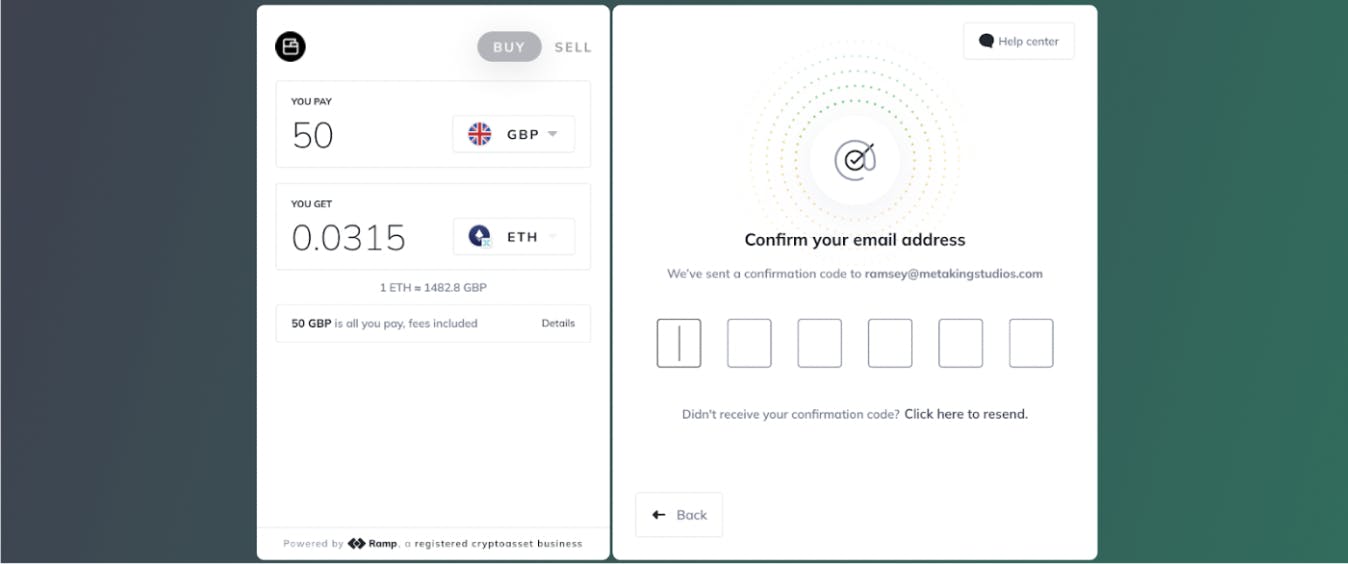
Fourth, select your desired payment method, and complete the Know Your Customer (KYC) verification. This only needs to be done on the first time you deposit using this method
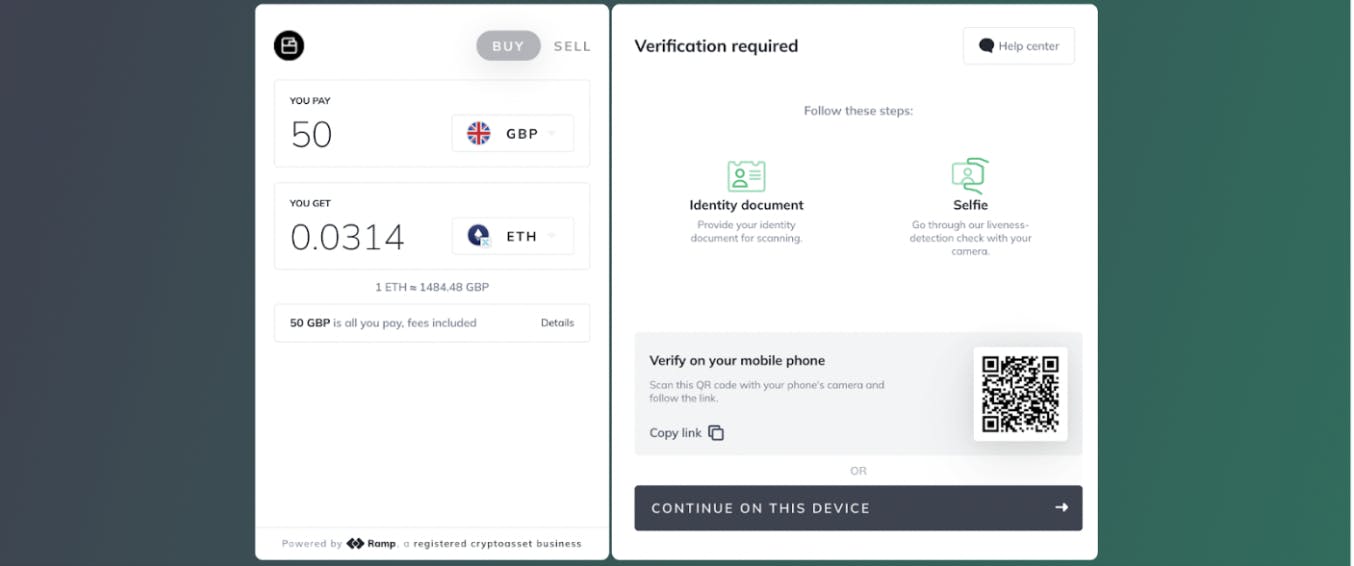
Follow the KYC instructions labelled and then your funds will be on their way to your wallet!
You can also move Ethereum to the Immutable X network within the GameStop wallet.
First, in your balance area, select “Move”. The move action allows you to bridge digital assets from the Ethereum Network and the Immutable X network.

Secondly, Select your desired amount, and the target chain, and review the move! (FYI, you can click max to transfer the whole balance)
Note: the transaction amount will be net of fees - as gas fees are involved in bridging.
Looking at the example used in this guide, we can see that the wallet starts with 0.01ETH, once we select max, the Move Amount is only 0.003ETH, as the wallet has already calculated the amount of gas required, and deducted it from the total - so you know exactly how much is being transferred.
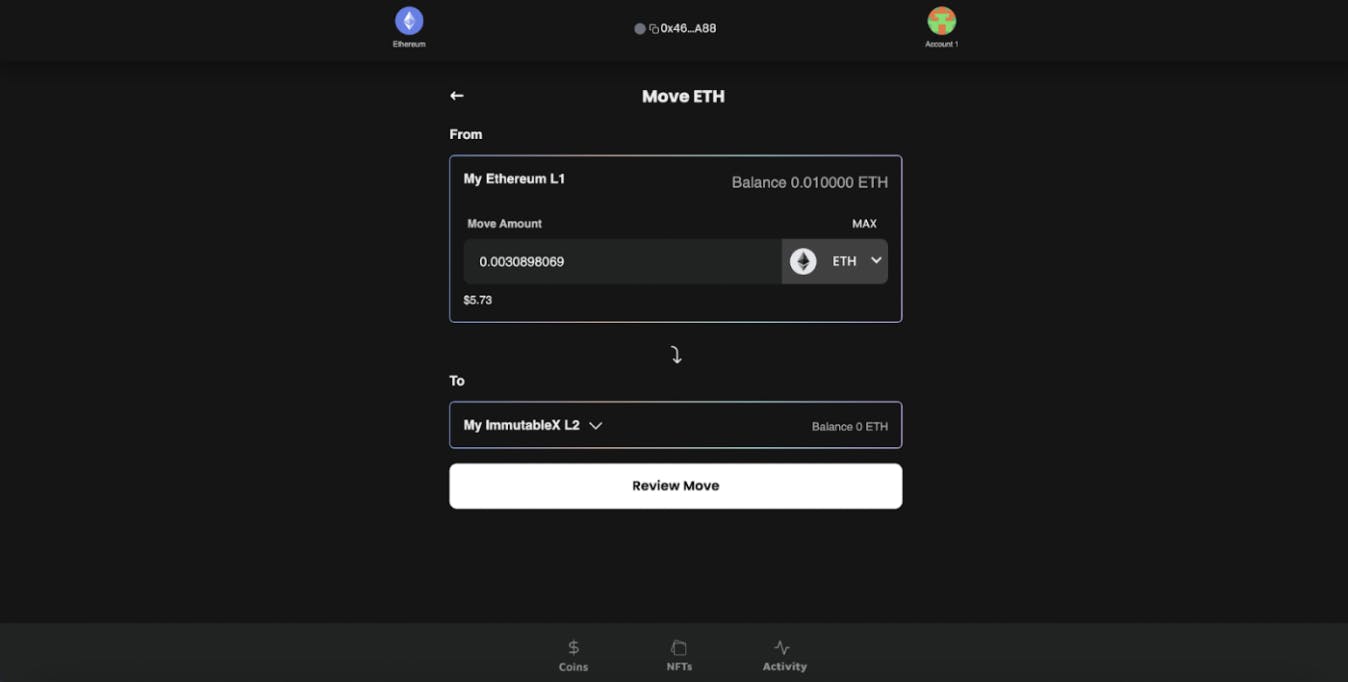
Lastly, Preview the transaction and confirm the move when happy. This step is important, make sure you are 100% okay with the transfer before it happens. Click confirm and send it on its way!
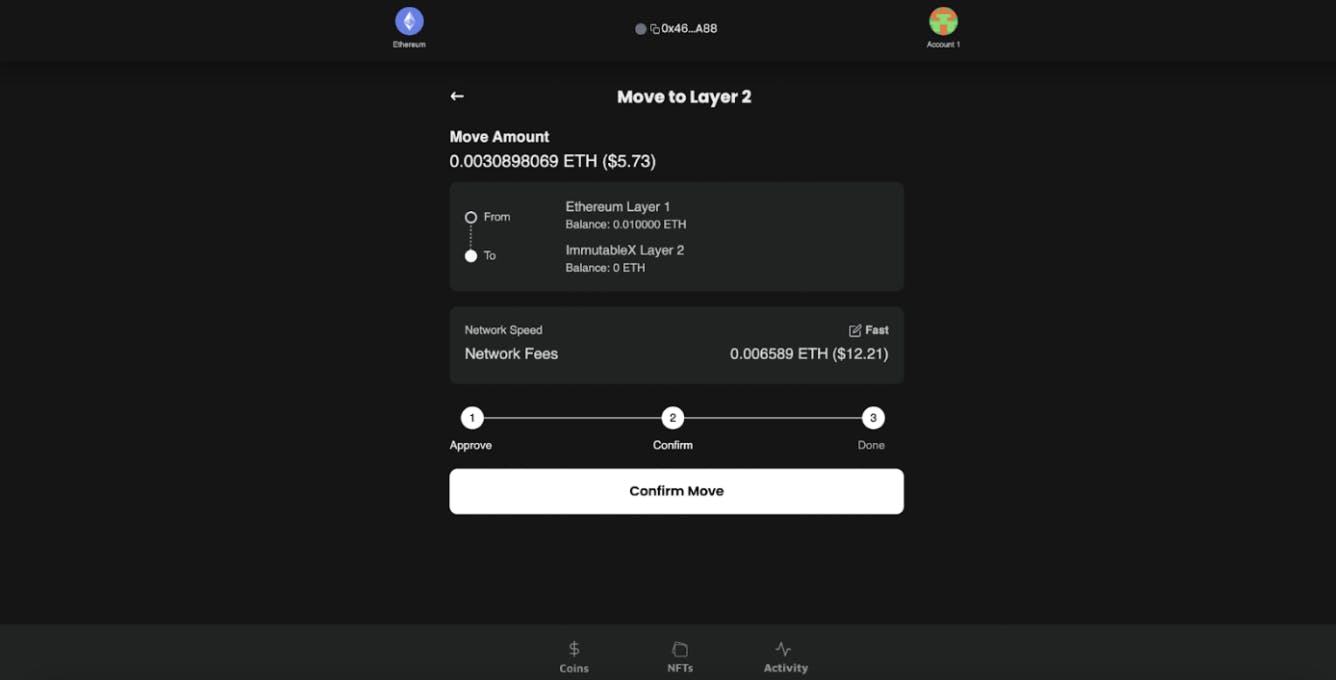
You can view the transfer progress in Etherscan, which can be accessed via a small icon link on the progress screen.
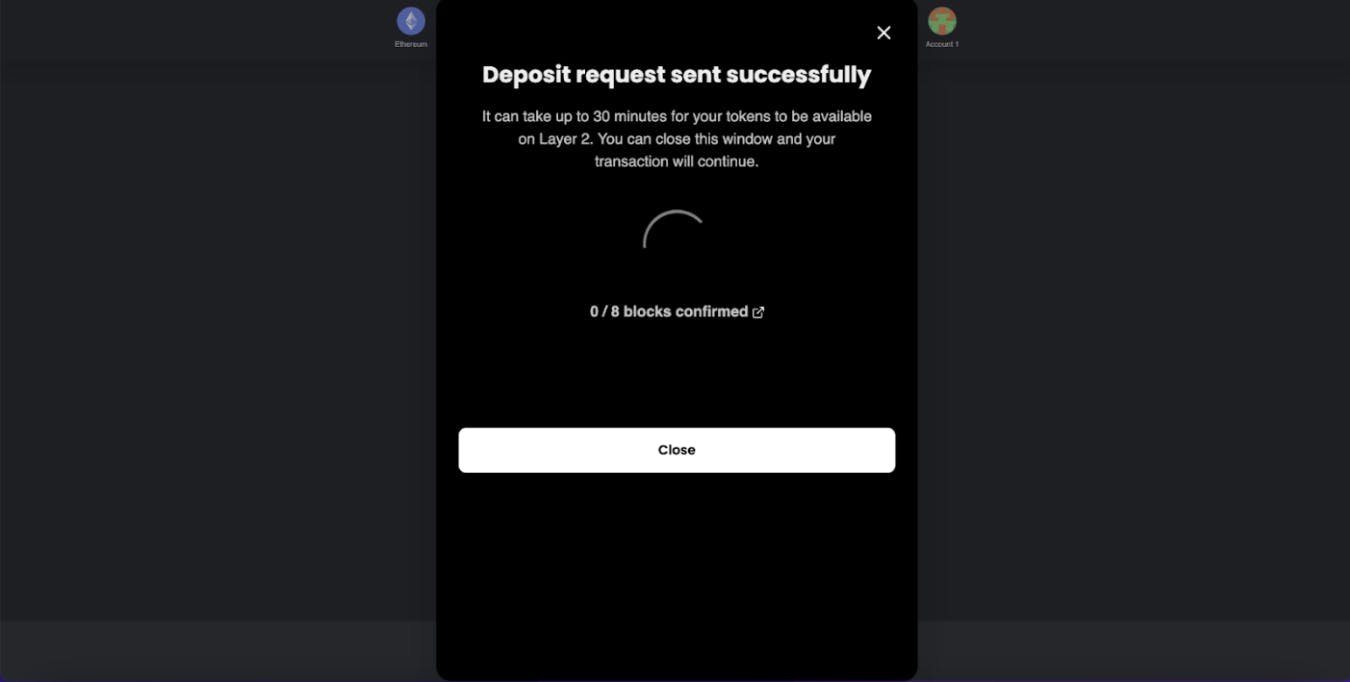
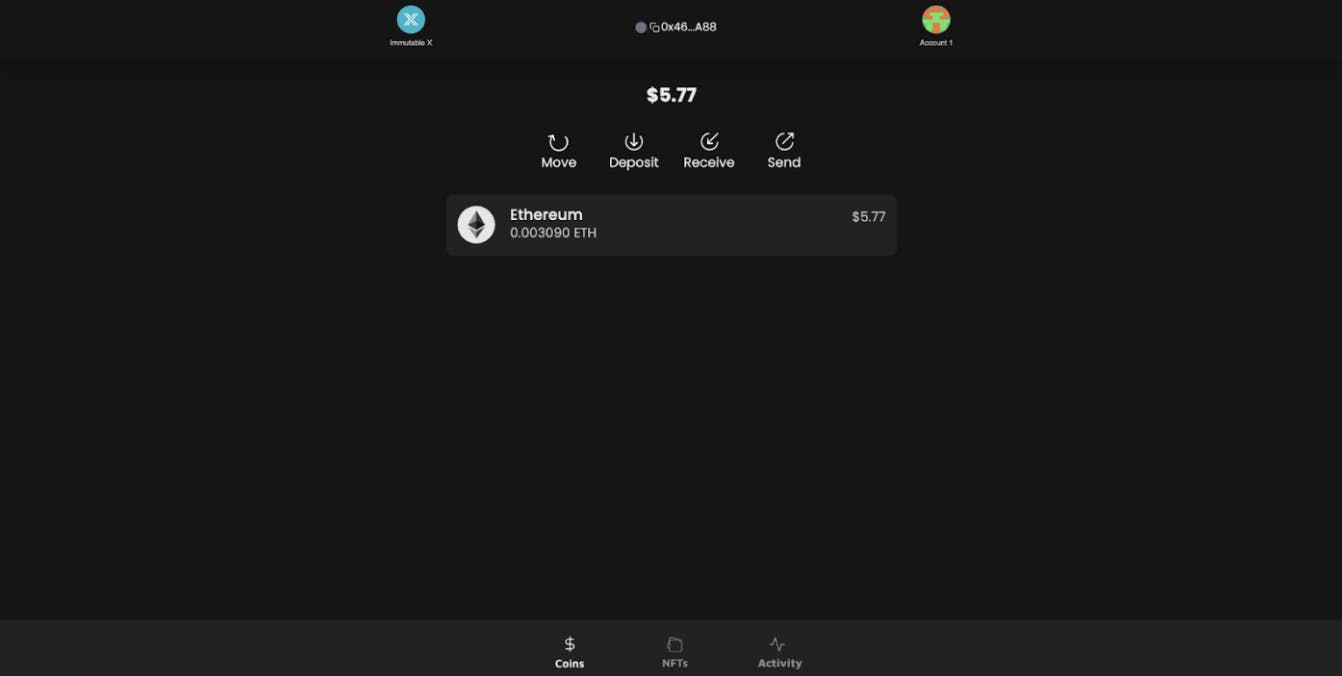
Your assets should then appear in your Immutable X wallet!
This method transfers digital assets from one wallet to your GameStop wallet. When using this method assets are transferred to a wallet on the corresponding chain. For example, if we had a MetaMask wallet connected to the Ethereum Network and transferred assets to my GameStop wallet, they would be transferred into the Ethereum GameStop wallet. If this is still confusing, don't worry, we will reveal all - it really isn't that bad. Imagine that you are transferring money in real life to someone, but they need to be at the same bank as you.
First, head to the wallet you desire to transfer from, and select the correct network, so you can see the digital assets. We will use MetaMask - thanks to the browser extension, you can have them both on the same tab.
Click “Send” in the MetaMask widget, and copy the GameStop Address by clicking it and paste into the highlighted section on the MetaMask widget
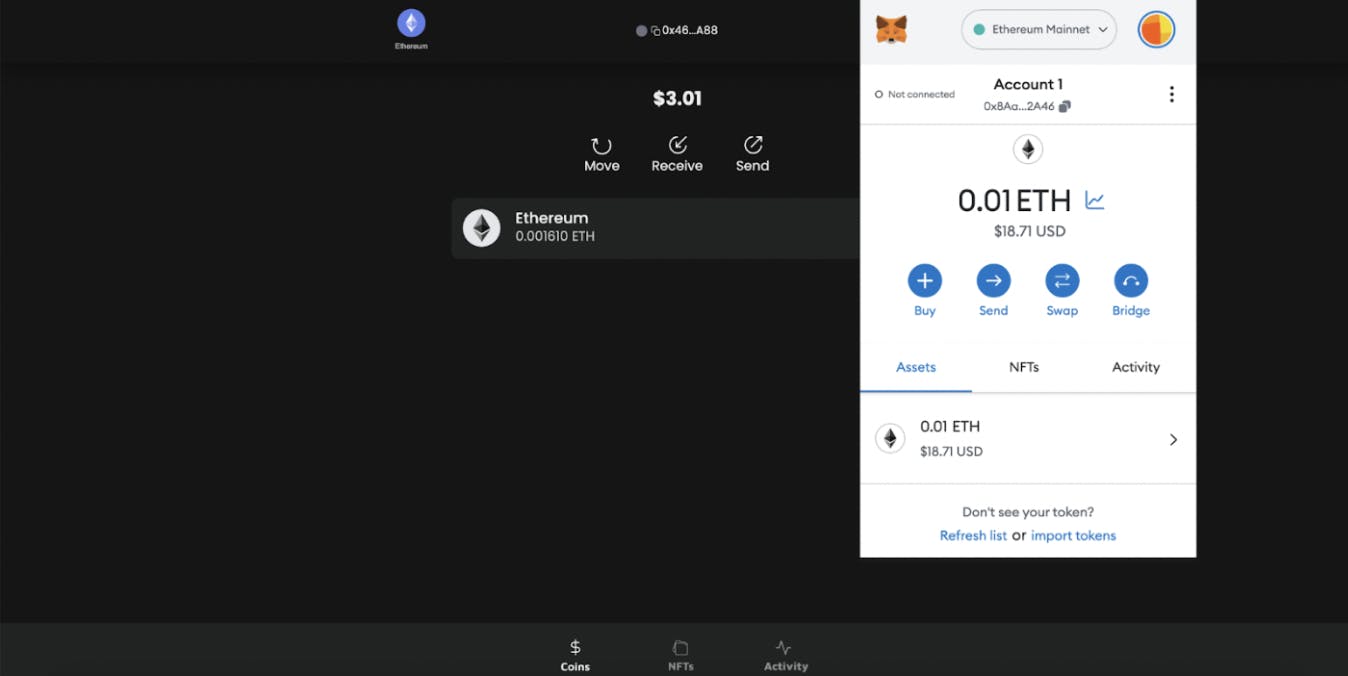
Secondly, enter your desired amount and, and click “Next”, then review the transaction and click confirm when happy, your digital assets will then arrive in the GameStop wallet
Pro tip! If you accidently click of the widget, you will not lose progress, just click the MetaMask icon in the toolbar - it will have a blue “1” on it to signify there is one action pending.
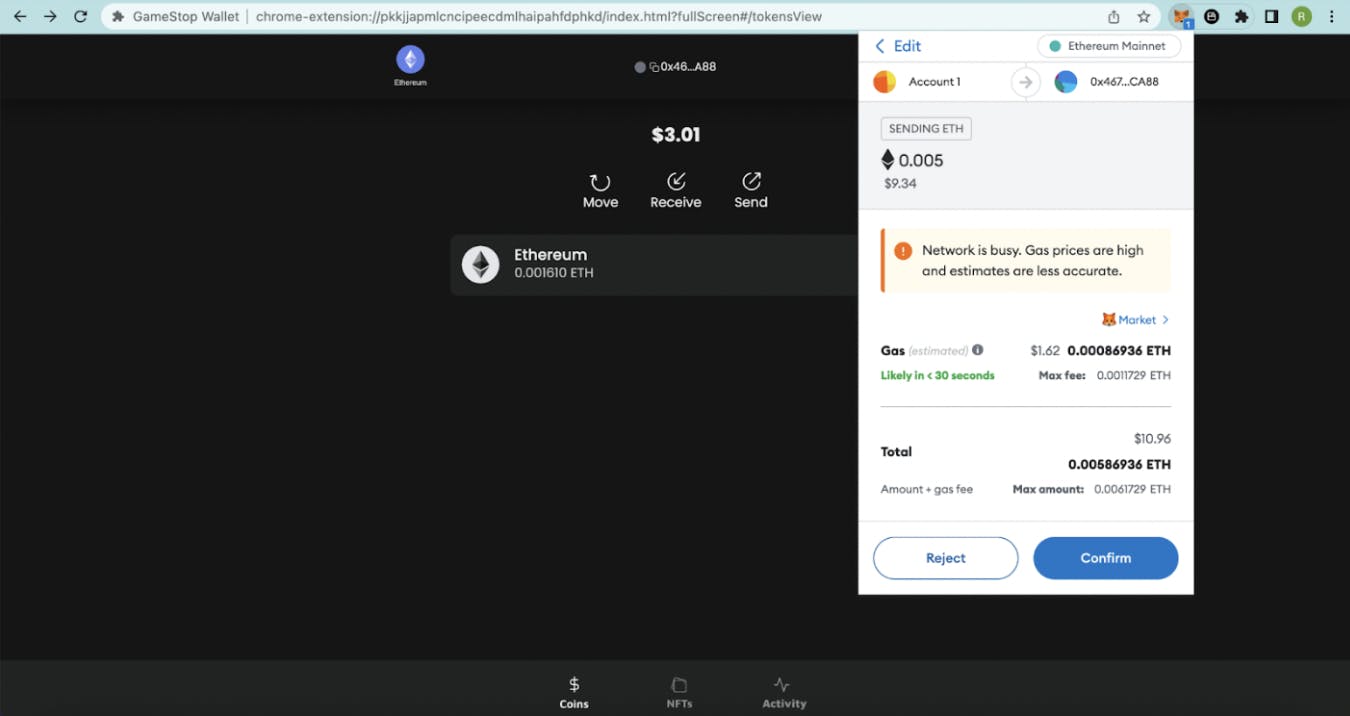
And Voila, your assets will be in the GameStop wallet, and as always you can track the progress on Etherscan.
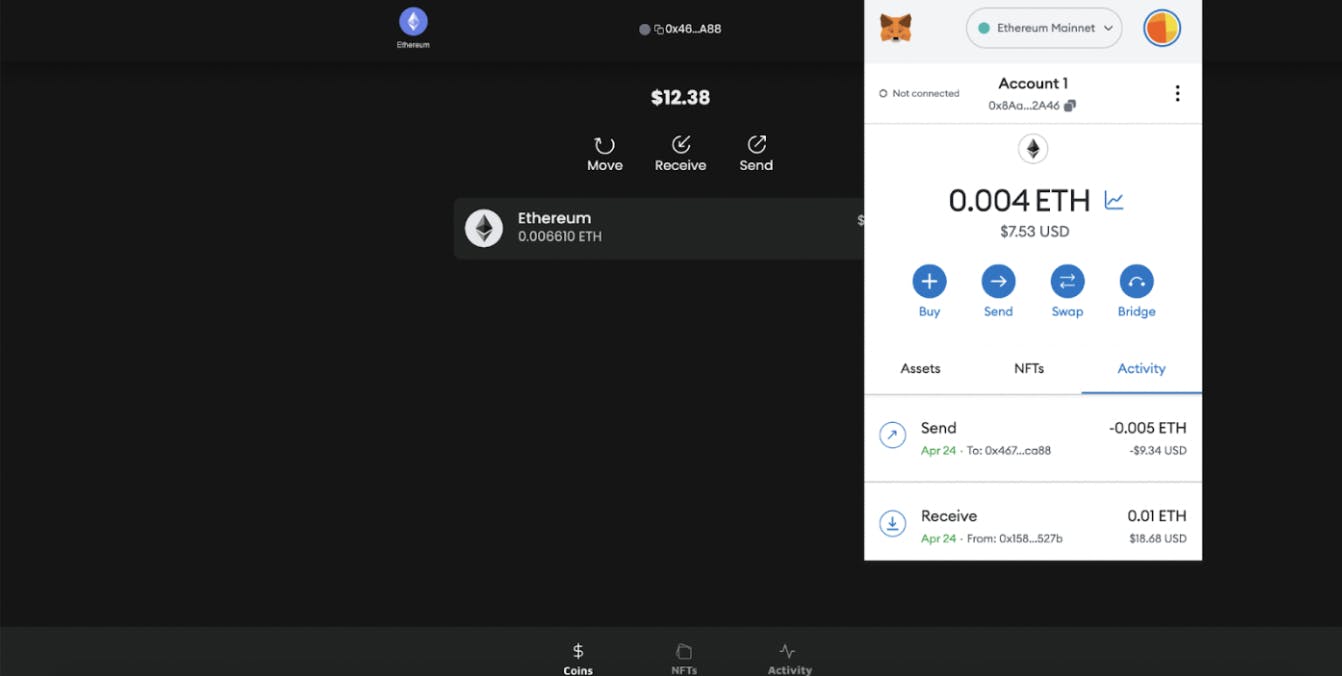
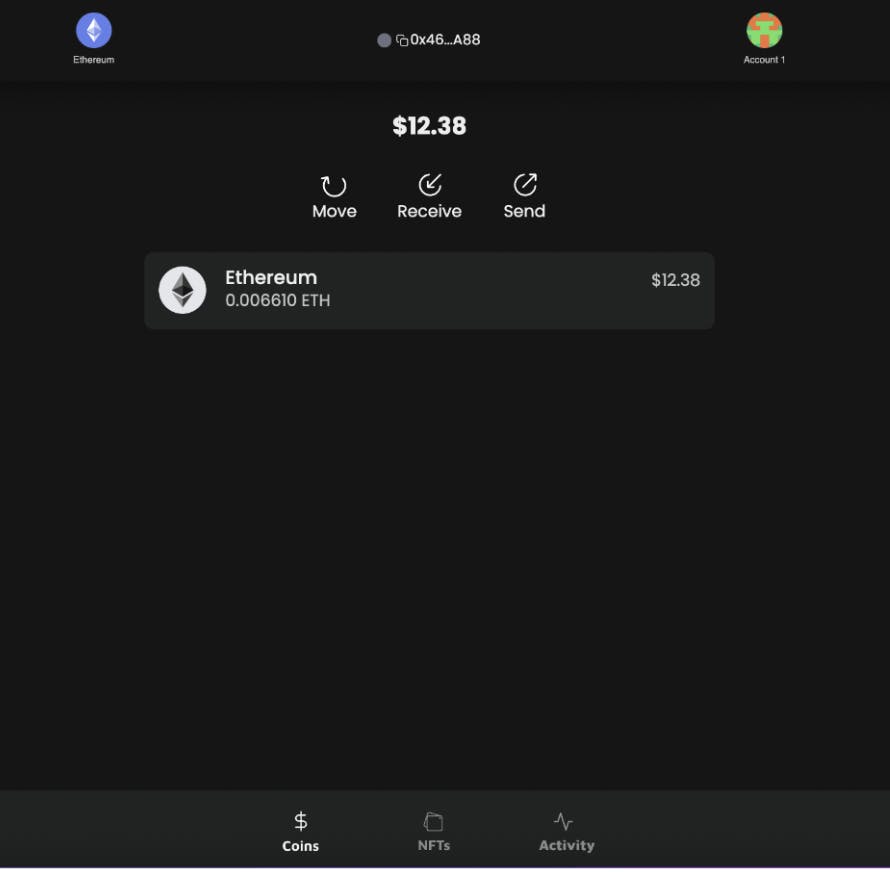
Now back to what we were talking about at the beginning of this segment, when you transfer your assets to another wallet, they will be available for viewing while you are connected to the network. This is what we mean
Connected to the Ethereum network - shows the assets we just transferred.
When connected to the Immutable X network - it shows the assets we transferred via the “Move” feature
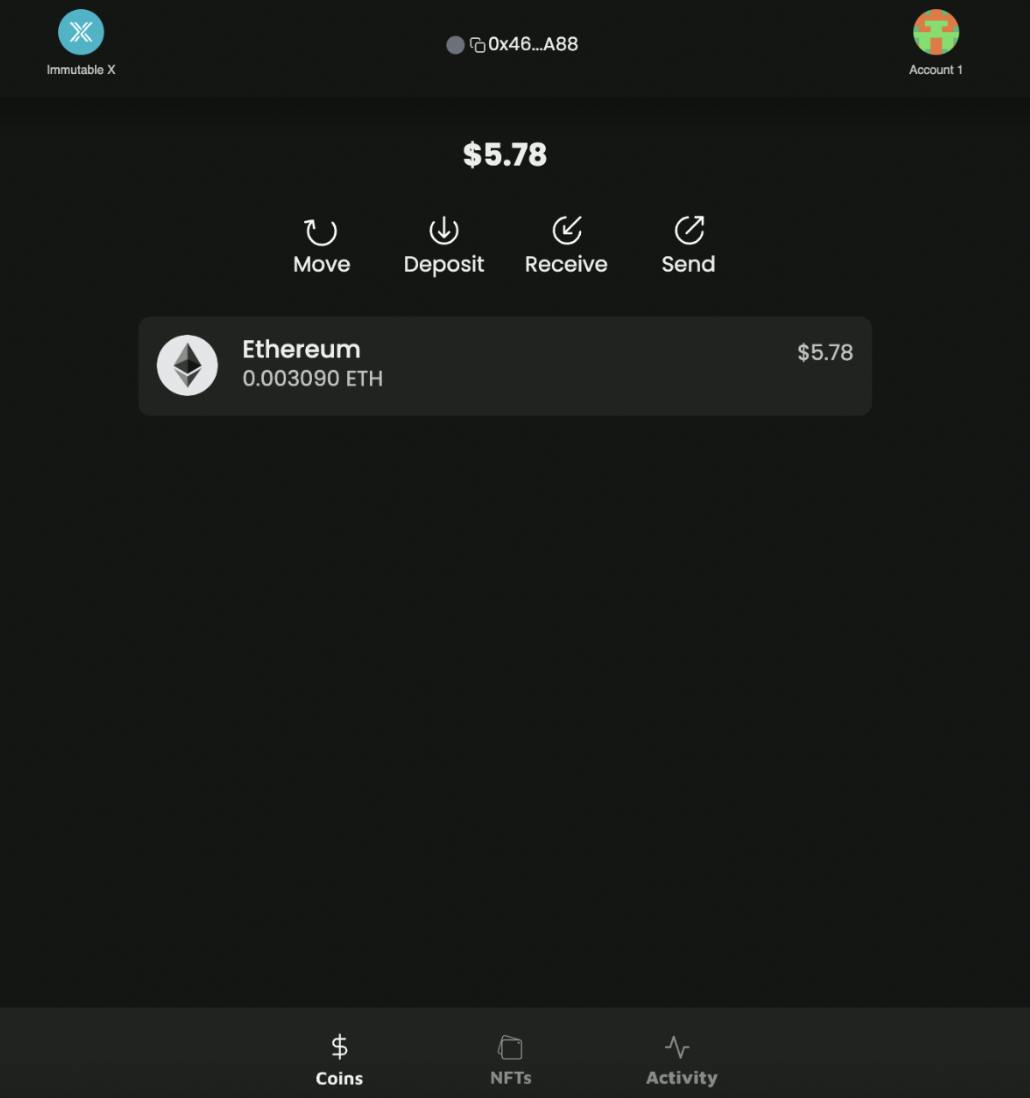
So if you ever think you may have lost your digital assets, just check your wallet is on the right network!
We hope this guide has been insightful, and enabled you to create, and fund your GameStop wallet without a hitch. Save this in your bookmarks so you'll never forget!
Next Steps - Play BLOCKLORDS!
14.02.2025
news
4 mins read

14.02.2025
news
4 mins read
How does AI reshape the future of strategy games?
14.02.2025
news
2 mins read

14.02.2025
news
2 mins read
Blockchaingamer.biz on AI agents in BLOCKLORDS
11.02.2025
news
4 mins read
11.02.2025
news
4 mins read
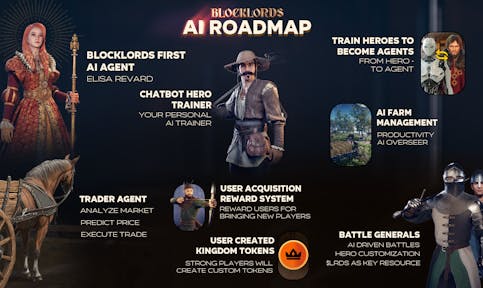
Age of Intelligent Heroes Begins!